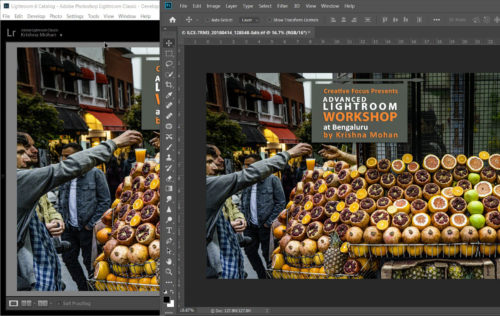
Adobe’s Lightroom Classic is an incredibly powerful tool incorporating perhaps 80-90% of all the tools that we photographers generally need. There are however times, when we need to do some post-production work in Photoshop, perhaps working in layers, maybe for the content-aware tool, whatever the reason, we need to be able to move cleanly from Lightroom to Photoshop and back. As both programs are by Adobe they are well-integrated, and it is fairly easy to do although it might not be obvious to everyone, how to do it.
By default, when you install Lightroom, it should recognize a Photoshop which is installed and automatically connects with it. To check this and to make further preference changes, go to the Lightroom menu, and select Preferences. From the tabbed window that opens, you should see that the third tab is External Editing.
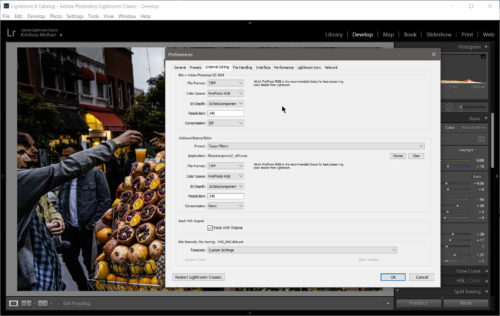
In the upper section, it shows that Lightroom has recognized your Photoshop version. The other options can be changed to suit, although Adobe recommends that you keep the colour space like ProPhoto RGB. You can change the file format between TIFF (preferable) and PSD, the bit depth, keep it at 16 Bit for ultimate colour quality, the resolution which is a default of 240, you may wish to increase this to 300 if you are outputting larger images to print and the compression. Selecting no compression will give you the very best quality but also very large files. The reason to use compression, whether it’s ZIP or LZW, is entirely to do with file size. You’ll end up with files that are smaller without any loss in quality.
You will also see a duplicate of the upper section below, allowing you to add other third-party external editors such as Gimp, or, for example, standalone HDR software. Once you are happy with your set up, close the preferences dialogue. I prefer to use the same setting in the external software unless they are not compatible with such settings. Much older software may not support ProPhoto RGB. Check the help file of the program to determine which setting is suitable to use.
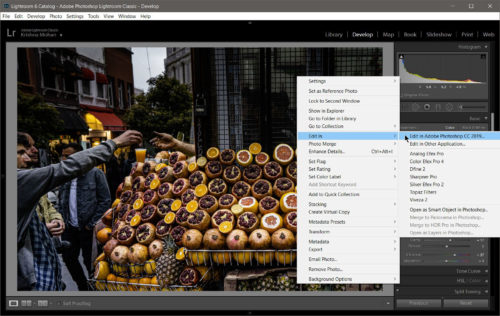
Make sure to finish all the required adjustment to your image in Lightroom’s Develop module before sending it off to Photoshop. Once happy, in either the Library or Develop modules, right-click on the image and select the Edit in Photoshop option (Ctrl + E is the shortcut). Remember that once you open in Photoshop and save the file, it will not be any more a Raw file. If you are editing a Raw file, the file will open in Photoshop without any dialogue.

If you have an older photoshop but newer lightroom, you might get dialogue like the one above. In this dialogue, select/click any of the following:
Don’t show again: Select this option if you don’t want to see this dialogue in the future. The raw image from Lightroom Classic opens directly in Photoshop. However, some of your Lightroom Classic edits may not appear in Photoshop if the Camera Raw versions are incompatible.
Render using Lightroom Classic: Lightroom Classic processes your raw file to render a new TIFF or PSD file, which automatically opens in Photoshop. All the edits that you’ve made in Lightroom Classic appear in Photoshop when you render using Lightroom Classic.
Open Anyway: Continues to open your raw file in Photoshop. However, some of your Lightroom Classic edits may not appear in Photoshop due to the incompatibility between the Adobe Camera Raw versions.
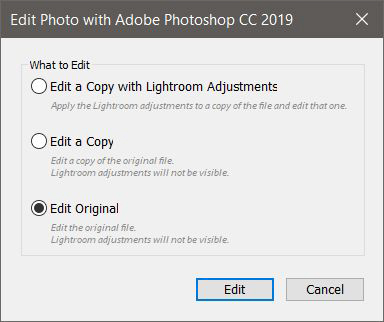
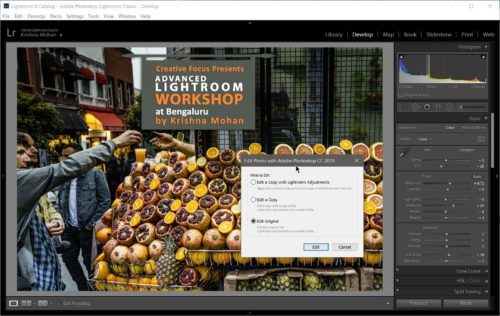
If you are opening any non-raw file – JPEG, TIFF or PSD file, you get the dialogue asking if you wish to either edit original, edit a copy or a copy with the Lightroom adjustments added.
Edit A Copy with Lightroom Classic Adjustments: Applies any Lightroom Classic adjustments you’ve made to a copy of the file and sends that file to Photoshop for editing. If you have made some Lightroom adjustments, then this option is the best. Please note with this option any layers in TIFF & PSD file will be flattened to one Background layer.
Edit A Copy: Edits a copy of the original file without Lightroom Classic adjustments. Layers are preserved in TIFF & PSD.
Edit Original: Edits the original file without Lightroom Classic adjustments.
Bear in mind that unlike Lightroom, Photoshop uses destructive editing so any adjustments made to an original will be permanent.
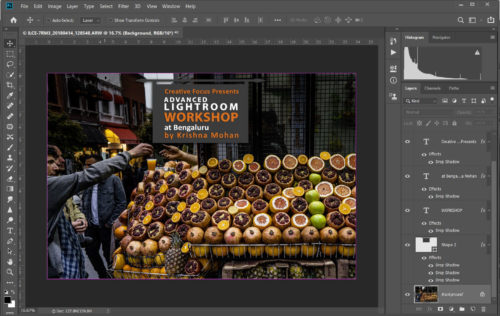
Once your image is opened in Photoshop, you can use all of that program’s powerful features to manipulate your image. Once happy the return trip is very easy. Simply select File Save from the Photoshop menu. You will see that the file name of the image will automatically change to include a -edit suffix. It is important that you do not change the file name yourself in Photoshop as this will break any links back to Lightroom and require that you re-import the image manually.
You do not need to close the image in Photoshop but in Lightroom, you will see that a new version of the original image has appeared in the Lightroom catalogue with the file type you selected in your initial preferences, either TIFF or PSD. It will have a suffix -edit to identify that it was edited outside lightroom. If you leave the file open in Photoshop and carry out any further work, every time you save the image, the adjustments will be updated in the Lightroom catalogue. It’s simple as that.
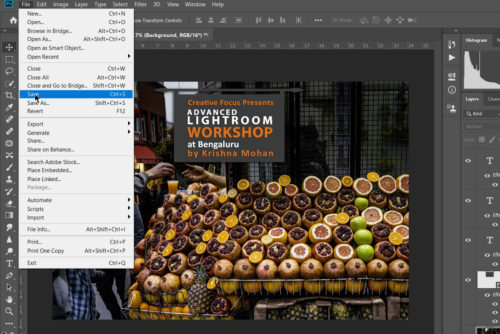
Let us say you wanted to re-edit this photo after importing back into Lightroom doing some Lightroom adjustment while it is closed from the Photoshop.and . Since the file is not anymore, a raw file but a TIFF file you get the same dialogue which comes out for a non-raw file.
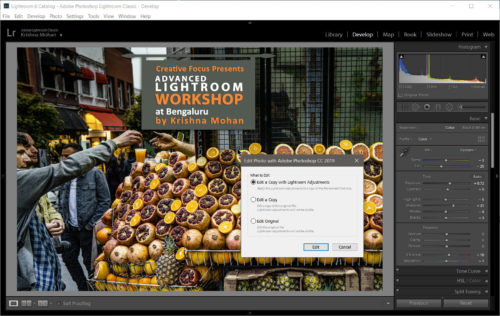
Here is where most get confused. If you choose Edit A Copy with Lightroom Classic Adjustments, all layers will be flattened into one background layer and all Lightroom Classic adjustments made after that Photoshop save, are added to the file. If you don’t mind losing the layers, this is a good option.
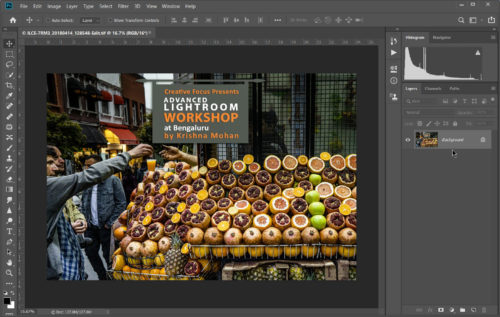
Notice the Photoshop Channel panels on the left side. All layers are now flattened into one background layer.
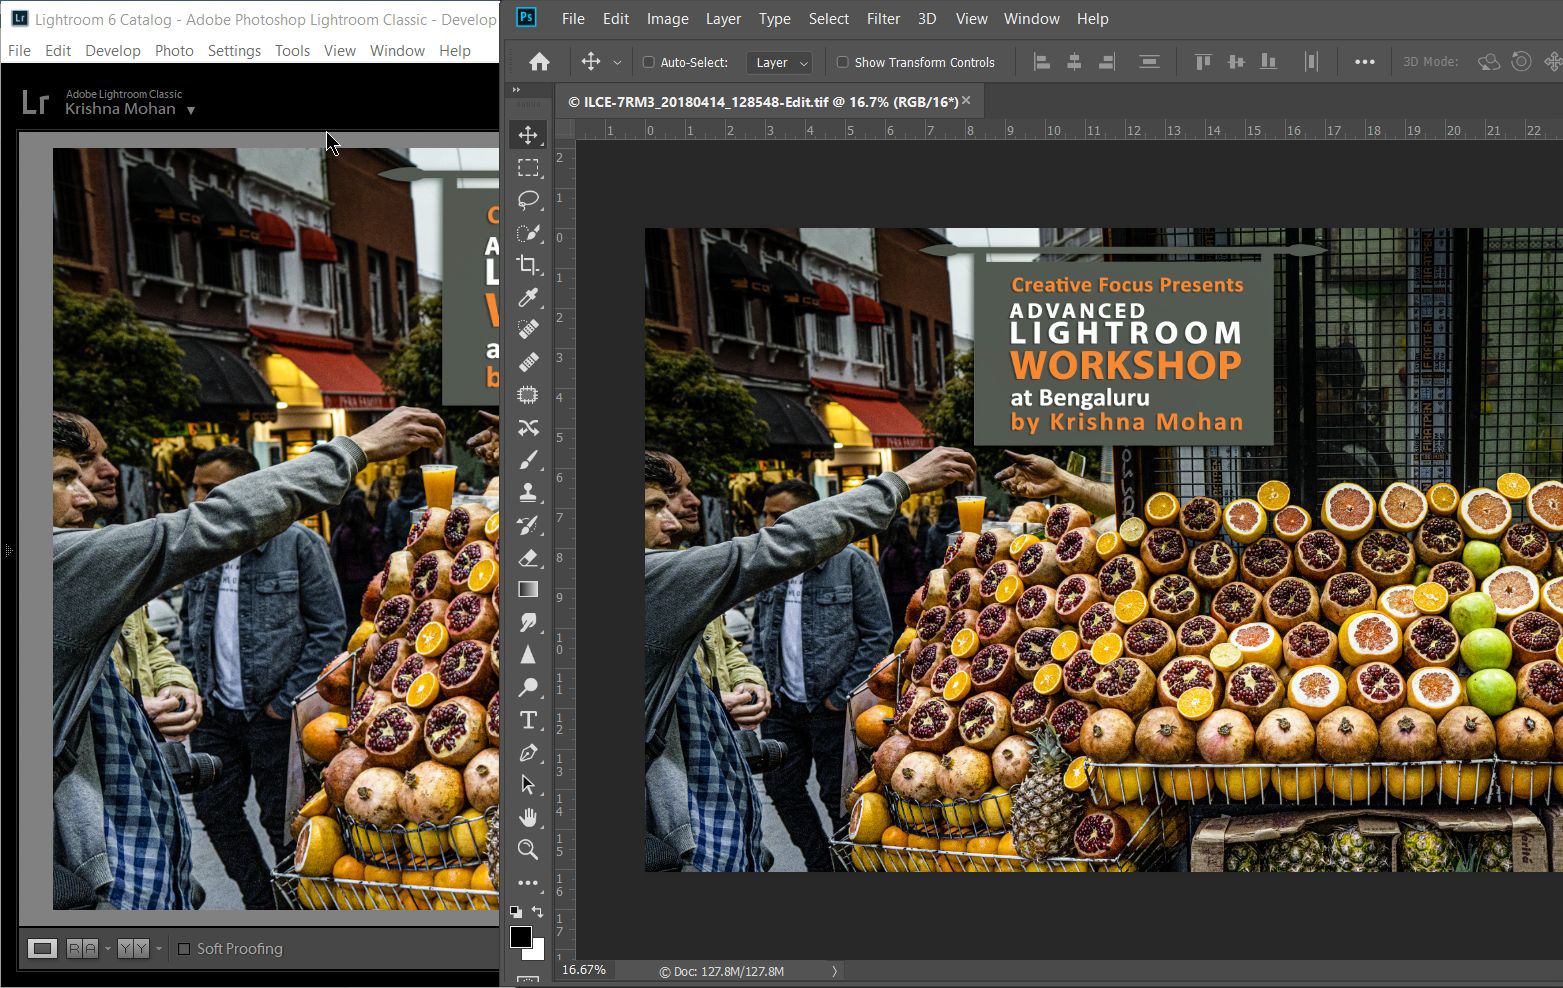
Instead, if you choose Edit Original, it opens the TIFF files with all layers intact as it was saved in Photoshop earlier, but all Lightroom Classic adjustments made after that save are unfortunately are lost. If you choose Edit A Copy, it will be same as above, but there will be a second copy of the TIFF file. This is why it is advisable to complete all the Lightroom edits before sending it to Photoshop.
Bonus tip: If you plan to edit it again in Lightroom after round-tripping from Photoshop, check my workshop video below which explains how you can send the file from Lightroom as Smart object to Photoshop which can be opened in Adobe camera Raw which has same editing control as Lightroom.
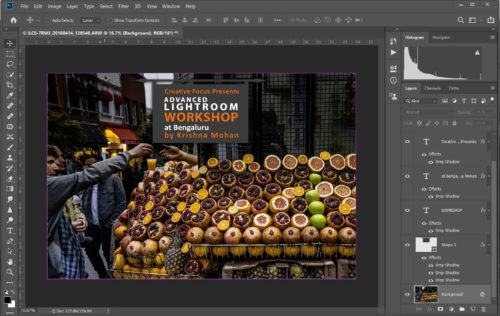
Notice the left side of Photoshop Channel panels. All layers are now intact.
Round tripping between Lightroom and Photoshop opens up the doors to the full range of Photoshop’s powerful editing features, allowing the photographer to seamlessly work between his Lightroom catalogue and Photoshop itself. One small caveat that is worth remembering is that because the returned files are PSD or TIFF if you work on a large number of images, you may find your hard drive space being eaten by the extra size of these files, but this is a relatively minor price to pay for the great flexibility.
[youtube]RGMOIXrZf7w[/youtube]
Here is the video clip showing “How to Properly Transfer Images from Lightroom to Photoshop and back!”. This was done as a live recording during my Creative Focus Advanced Lightroom Workshop held at Bengaluru on 24th August 2019.
If you have any doubts, comment, suggestion please express the same in the comment below. I will try to answer all your questions, the best of my ability.

Hi there,
very nice tutorial! Thank you very much for the invested time in sharing your know how. I’ll definetly use it for my projects.
Greetings,
PSPro
Excellent information Thanks For Sharing