As promised in my last blog I am showing you how I converted the image sequence into the video. When I took the photos of that Oriental magpie Robin I was not planning to do the image sequence. Ideally a tripod mounted stationary camera would have been excellent for such an image sequence. If you plan to do time lapse series then tripod mounting is a must. The following method works well with time lapse sequences too.
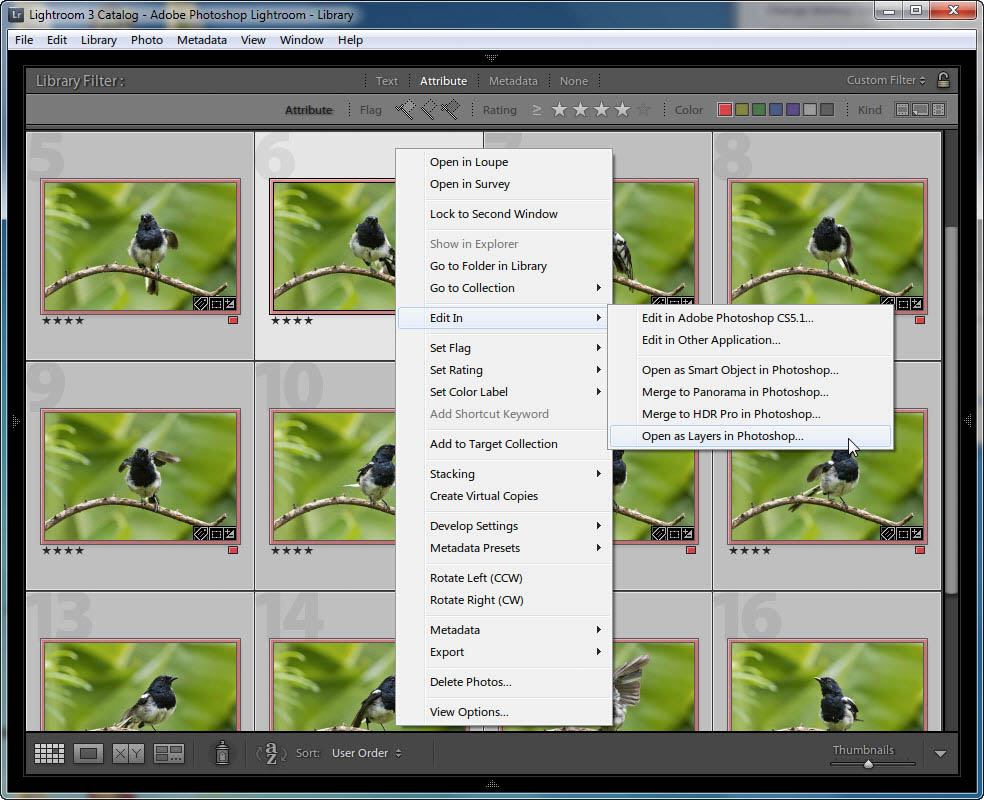
Since I had the photos handheld I needed to align the main branch where it was sitting in perfect alignment. So after processing all Raw photos in Adobe Lightroom I chose the right click menu Edit in -> Open as layers in Photoshop.
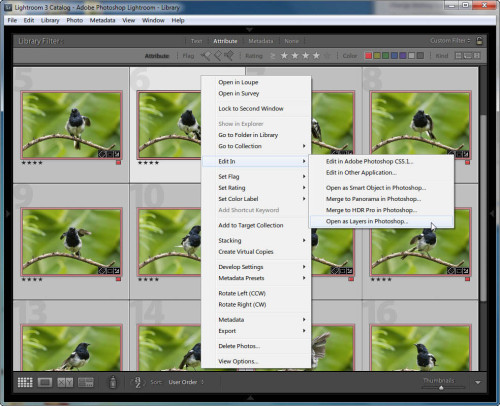
This will export the photos to Adobe Photoshop and arranges all the 15 photos as layers of a single file. To align images this is ideal method.
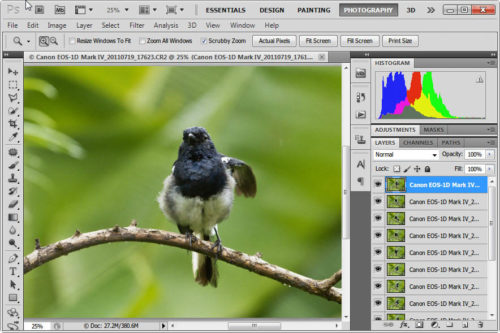
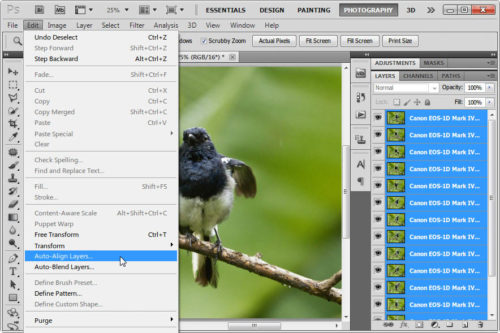
I chose all the layers in Adobe Photoshop and from the Edit menu -> Auto Align Layers.
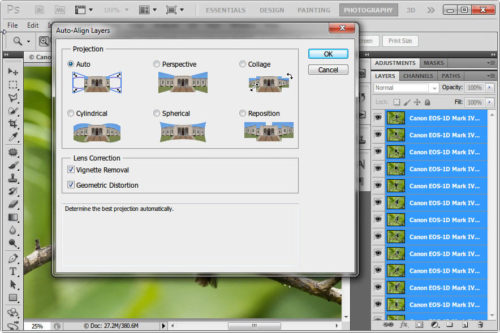
Under the Auto Align Layers options dialog box I chose both vignette removal as well as geometric distortion under the lens correction option. This may not be necessary if you have kept the aperture constant.
Now Adobe Photoshop will churn away depending on the speed of your machine aligning your images.
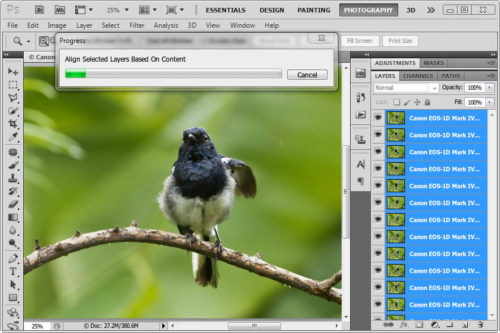
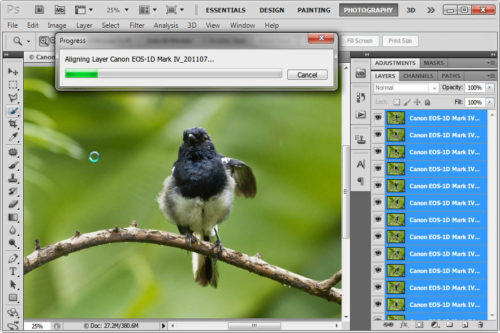
After a short wait you will be presented with perfectly aligned images. As you can see the edges of all the images will not be aligned.
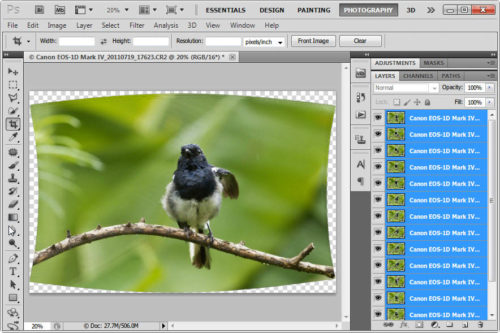
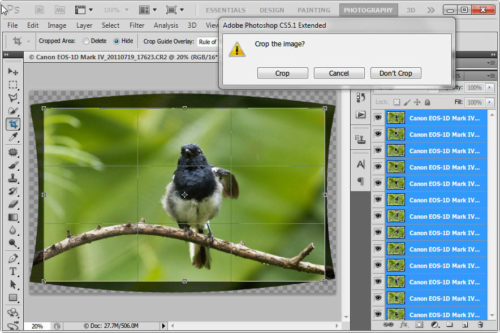
Next you need to crop all the images so that they will be of the same size and will not have transparent borders. This is accomplished using crop tool in Adobe Photoshop.
Now we will explore a hidden gem in Adobe Photoshop. If you plan to export all the layers as separate files you need to go to File -> Scripts -> Export Layers to Files option.
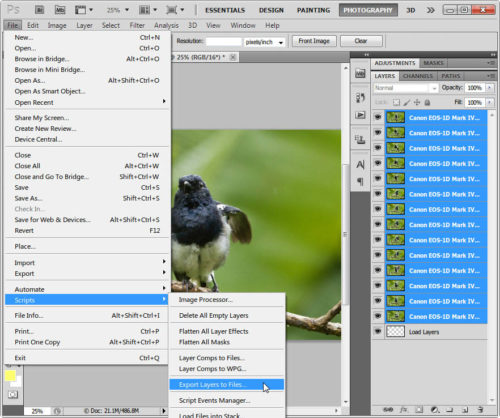
Now you will get 15 jpeg files out those 15 layers which were aligned perfectly using auto-align option. You can re-size these jpeg files to the final size of the video you want. I also added the matte frame and copyright info I usually add to all my photos. I use ImageMagick to accomplish this task as a batch file from command line.
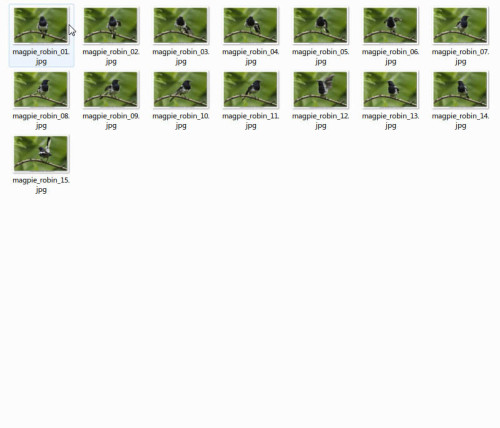
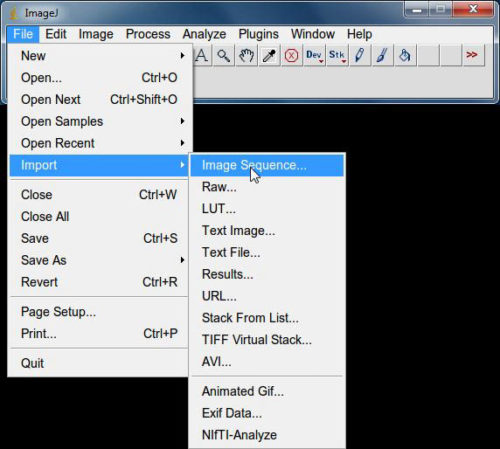
Now since you have 15 perfectly aligned images you can started porting them to video. If you already had the aligned images by using the tripod while shooting you will start from this point onwards. Even though many would like to use Apple Quicktime Pro for creating video, my preferred software is ImageJ. ImageJ is a powerful image analysis program that was created at the National Institutes of Health. ImageJ is open-source program written in Java, which allows it to run on Linux, Mac OS X and Windows, in both 32-bit and 64-bit modes. You may download this program from the source (http://rsb.info.nih.gov/ij/). After installing ImageJ choose File -> Import -> Image Sequence from its menu.
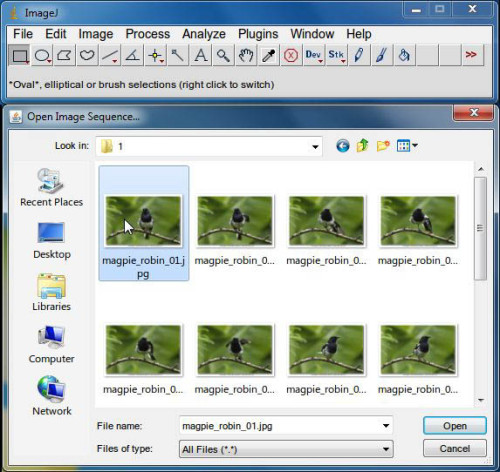
Once you point it out to the fist file in the image sequence ImmageJ will import all the 15 files and starts processing them.
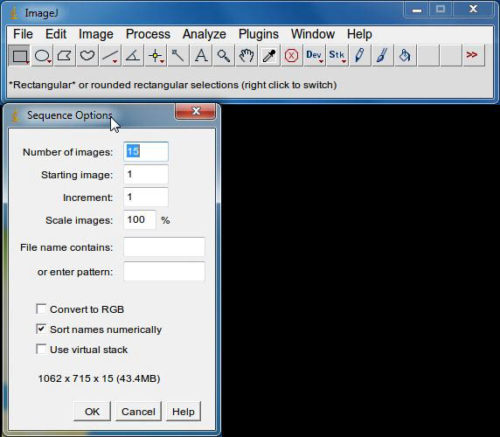
Following is the dialog about sequence options. You can leave it default like as I did or you can change them as you wish.
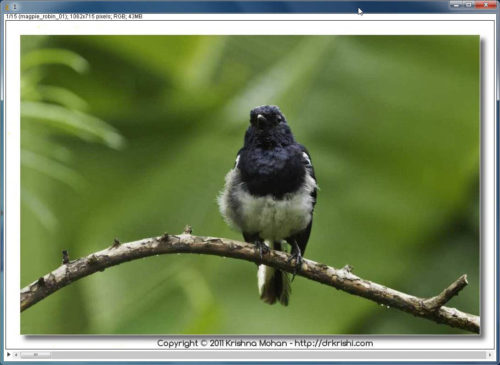
Next you will see the image sequences presented as video for you to watch in a inbuilt ImageJ player.
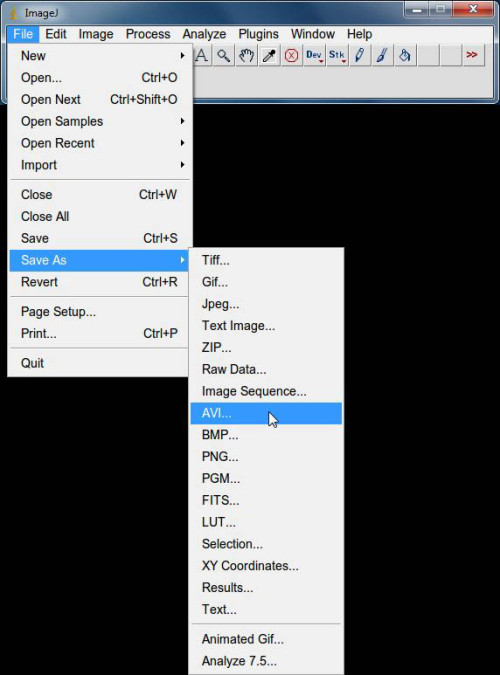
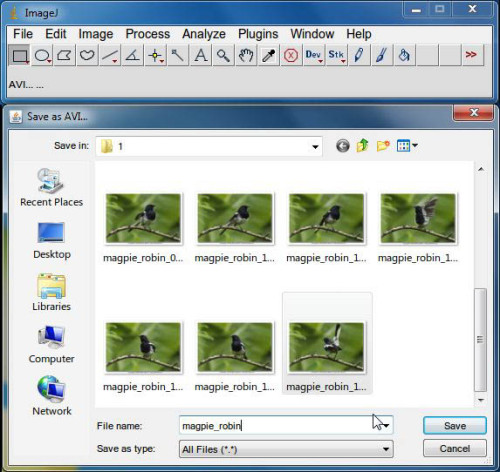
To save them as video file you need to choose File -> Save as -> AVI.
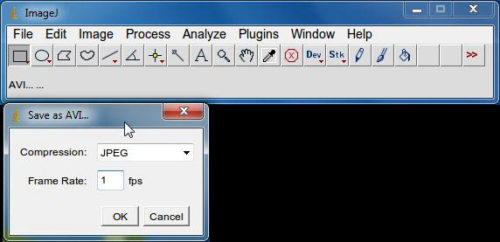
Next dialog will give you frame rate setting option. As I wanted file to have 1 frame per second option I chose such a slow frame rate. For time lapse sequences you need to choose faster frame rates.
Once you choose the name for the AVI files all your image sequences will be saved as a single AVI file.
I exported this AVI file to You Tube server so that it hosted for all to enjoy. Hope this tutorial will be useful for all the image sequence & time lapse enthusiasts who wants to make it into a video.

For long timelapse sets I would recommend the “image stabilizer” ImageJ plugin. For me photoshop would crash but the ImageJ plugin worked well (plus it’s free!!)
http://www.cs.cmu.edu/~kangli/code/Image_Stabilizer.html
AS,
Thanks for the info. As I mentioned in my blog ImagJ is my favorite app for time lapse work. I’ll try this plugin.
Regards
Krishi
Thanks a lot, both of you! 🙂
Very useful tips Dr. Krishi. Thanks
Very nicely explained Dr. Krish will be useful for all those who would like to try Time Lapse. Which version of PS did you use…?? Is there any alternate software to convert images to video is it possible in LR4……? Someday I would like to try my hand on it, these tips will be very much useful. Thank you very much sir.
Thanks Gopalakrishna Baliga
Thanks M V Bhaktha for wonderful compliments. I used Photoshop CS5 as this was in 2011. Lightroom does not allow you to convert time lapse photo to video. I used Photoshop & Lightroom for image alignment only as I had taken the photo handheld. If I had used Tripod it would have required none these software. Even though many would like to use Apple Quicktime Pro for creating video, my preferred software is ImageJ. ImageJ is a powerful image analysis program that was created at the National Institutes of Health. ImageJ is open-source program written in Java, which allows it to run on Linux, Mac OS X and Windows, in both 32-bit and 64-bit modes. You may download this program from the source (http://rsb.info.nih.gov/ij/). After installing ImageJ choose File -> Import -> Image Sequence from its menu. There is a stabilized plugin to ImageJ (http://www.cs.cmu.edu/~kangli/code/Image_Stabilizer.html) which can be used to reduce the jitteriness of the video.