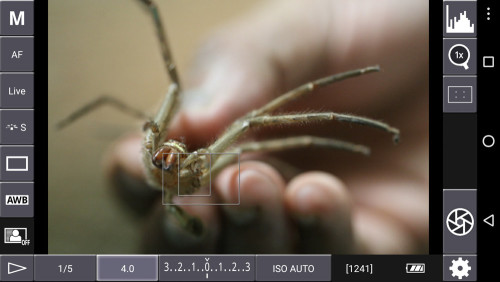
DSLR Controller is a great app which helps to remotely manage your camera using android phone or a tablet. Using the touch screen and the display of your phone you can control almost every function in your Canon camera and much more than what camera has to offer. Here is a brief review of features of this extremely useful application.
While most lower end cameras have Wi-Fi and touch screen capability, higher end, full frame professional cameras like Canon EOS 5Dmark III and 1Dx series lack them. What if you want to remotely view and control these cameras? Using Android tablets as a controller is a great solution. The control can be either via USB tethering or wirelessly via Wi-Fi. Today we will look at my favourite app for this purpose – DSLR Controller by Chainfire. Anyone who has rooted their android phone will know SuperSU app which is developed by the same author.
By simply attaching my tablet to my camera via USB, I am able to see what my camera is seeing, at high resolution on a phone or on a tablet screen. Not just passive viewing, I am also able to control many of the functions of the camera via tablet’s touchscreen. In order to make this happen, your device needs to support OTG (On the Go) on the USB port and you needs a OTG adapter. Most of the Android devices in the market are OTG compatible. You can download DSLR Controller from Google Play Store.
DSLR Controller features include but are not limited to:
- Live View
- Auto Focus (tap Live View)
- Manual focus adjustments (in AF mode)
- Histogram
- Zoom control
- Grid and aspect ratio overlay
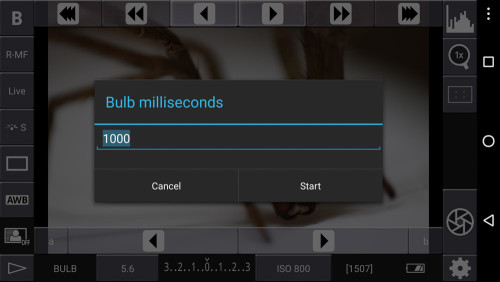
- Bulb capture
- Continuous capture
- Image review (+ follow shot, gallery)
- Image filters (peaking, contrast, channel mask, grayscale, 4 modes/filter)
- Video recording
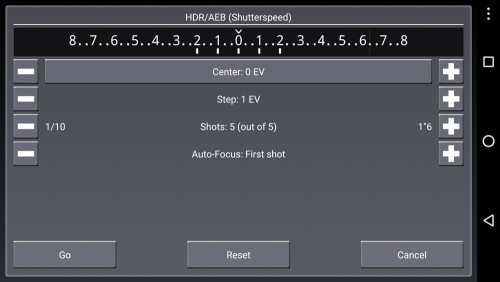
- HDR/Auto Exposure Bracketing
- Focus Bracketing (incl. HDR)
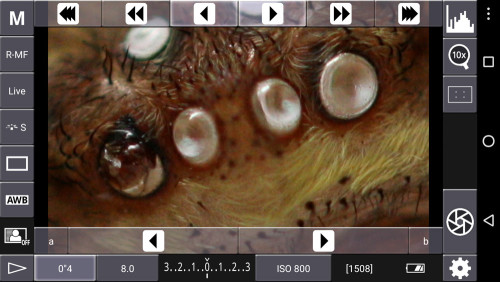
- Focus A-B
- Mirror Lockup support
- Timelapse (incl. HDR)
- Wi-Fi Passthrough
- Extensive modification of settings
- Shutter speed
- Aperture
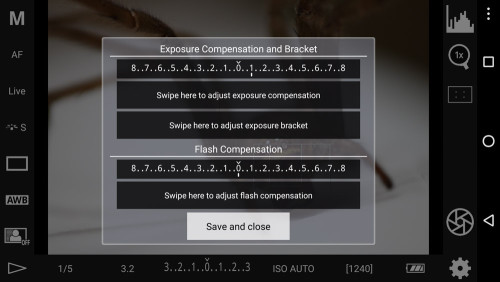
- Exposure Compensation and Bracketing
- ISO speed
- Auto-Focus Mode
- Focus and Zoom area (tap-and-hold Live View)
- Picture Style
- Drive Mode
- White Balance
- Colour Temperature
- Auto-Lighting Optimizer
- Metering Mode
- Image and video quality and format
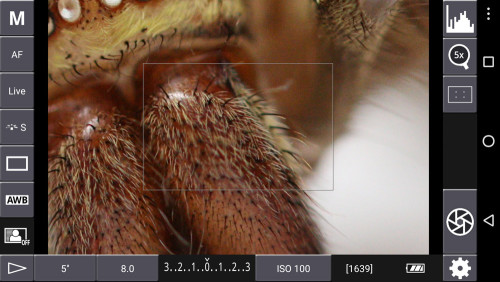
Available options depend on the mode you have your camera set to (M, Av, Tv, etc) and camera model. Just like magic lantern, Chainfire has harnessed the potential of the canon DSLR’s USB port in a much more robust and useful capacity than canon’s own USB connected software, EOS utility, which does little more than trip the shutter.
Before you get started, ensure that both your camera and your phone / tablet are compatible with DSLR controller. You can view a compatibility chart on the developer’s web site. While most canon cameras (2006 and later) are compatible with DSLR controller, the app doesn’t yet support Nikon. If you’re a Nikon owner, check out DslrDashboard instead. DslrDashboard app has lots of the same features, but in my tests it failed to work properly several times.
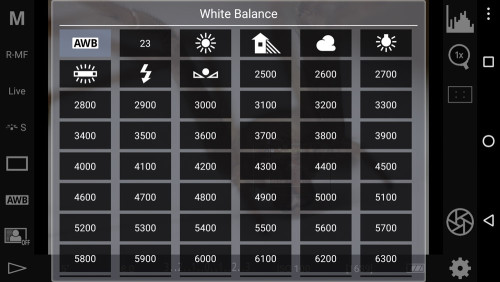
Using DSLR controller is pretty simple. Download and install DSLR controller on your android device. Then, connect a USB OTG adapter to your phone. Then, hook up a USB cable from your camera to the USB OTG adapter. Be sure to use the cable that came with the camera — not all USB cables will function properly with the app. (Eventually, if you found yourself using this setup often, you might want to pick up a longer usb cable.) finally, switch on the camera. Once your android tablet recognizes it, DSLR controller will launch.
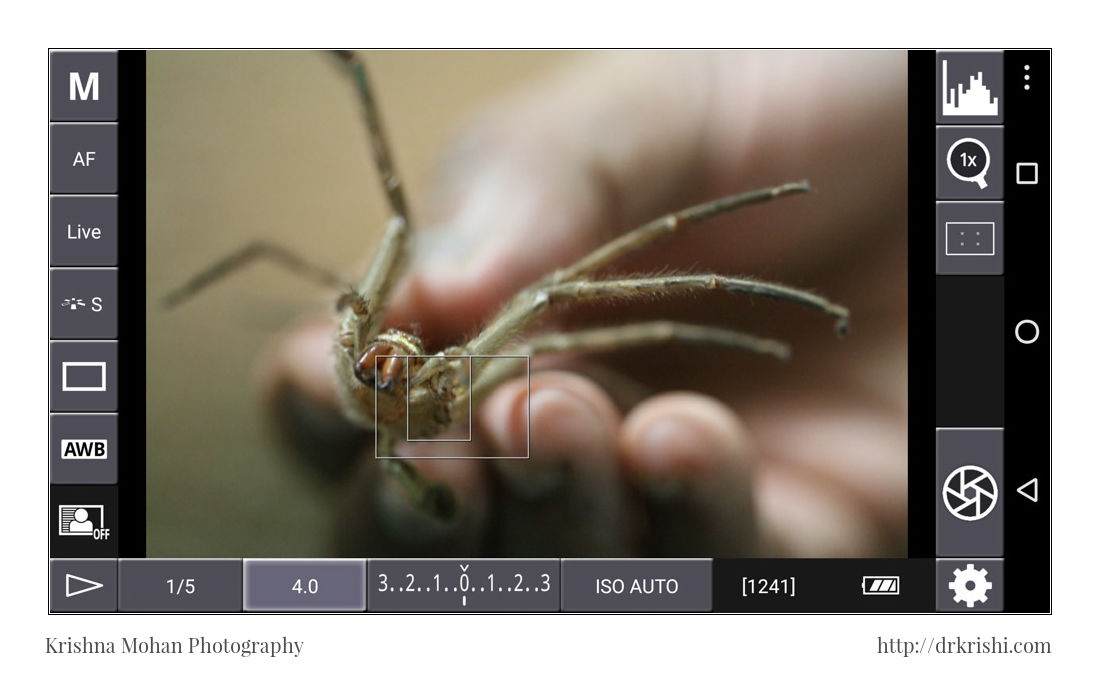
If you know your way around your camera, using the app will be pretty intuitive, too. That’s because all the controls you’re used to — white balance, ISO, and so on — are augmented in the app. On top of that, you’ve got a few tools not available on your camera.
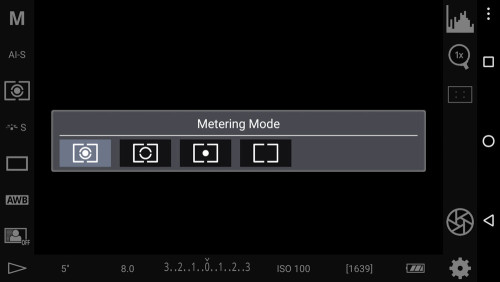
Shooting a photo is as easy as tapping to focus, then hitting the shutter button on the right. To reset your focus, long-press on a different spot in the frame. Then, check out the various tools along the edge of the screen. Focus mode, picture style, drive mode, white balance, and other shooting mode-specific options can be tweaked from there.
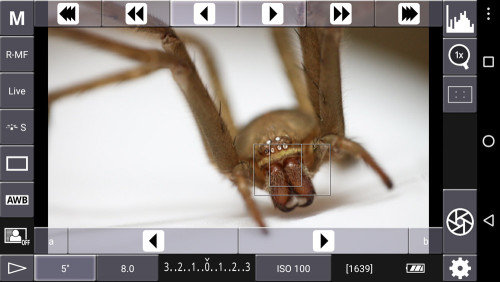
Focus mode is an interesting one, because manual focus actually has an automatic element. Instead of the focus being adjusted with the lens itself, it’s fine-tuned with arrows in various increment ranges. First, select the increment at the top, then use the arrows at the bottom to adjust the focus. It’s one of the tools that really exemplifies why a larger LCD screen is so useful; fine-tune and check the focus once, and you’re set.
At the very bottom, you’ll see a play button, with which you can view all the photos stored on your camera’s memory card. In that area, you can delete photos and save them to your android device for quick editing and sharing.
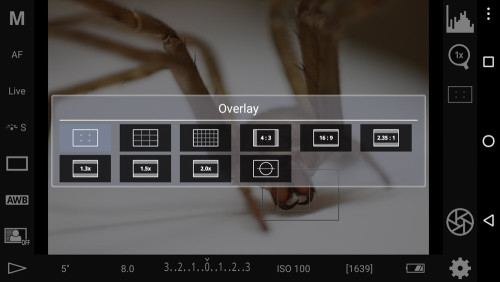
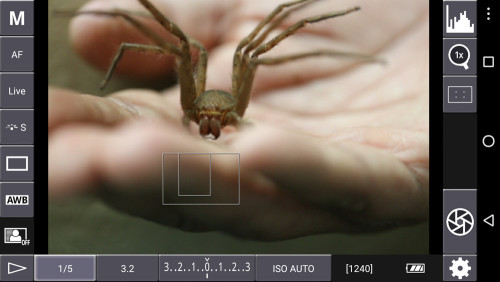
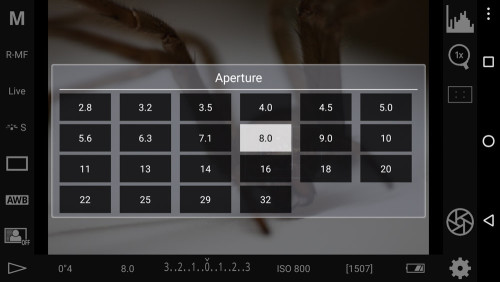
Just remember that, obviously, the functions available in the sidebar correspond to whatever shooting mode you are in. DSLR controller really works best when you’re in manual, aperture priority, or shutter priority. The app also works in movie mode. Along the bottom, the camera functions continue. In order, you can change the shutter speed, aperture, exposure, and ISO. To the far right are two very useful indicators — shots remaining, and battery.
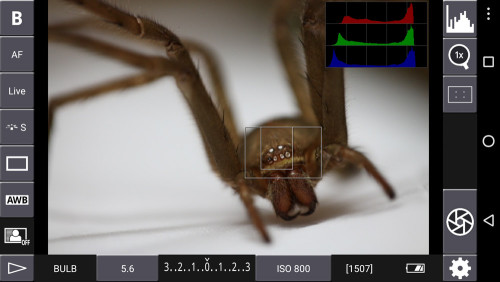
Up top, tap the histogram button to quickly view an RGB or gray scale histogram, useful for evaluating the lighting and exposure. Below that is a magnification tool that you can use to zoom in on your shot and carefully check the focus. To use the tool, drag the white box to the area you want to home in on, then tap the magnification button. Finally, you’ve got a grid tool, for maintaining a specific ratio or viewing the “rule of thirds” grid.
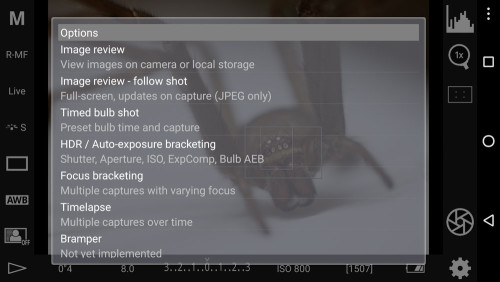
In the bottom-right corner are a big shutter button and settings. Settings is where app options can be tweaked, and that’s also where you’ll find the tools that make dslr controller that much more useful. Head to settings, and you’ll see a mix of app options and advanced tools. There’s a lot to dig into, but here are some of the most noteworthy ones: with DSLR controller, you can choose to store the photos on your android device in addition to your camera. If you absolutely want access to all your shots on your android device, choose to save them there. Otherwise, it’s better to import photos as needed, since saving to both devices could slow things down.
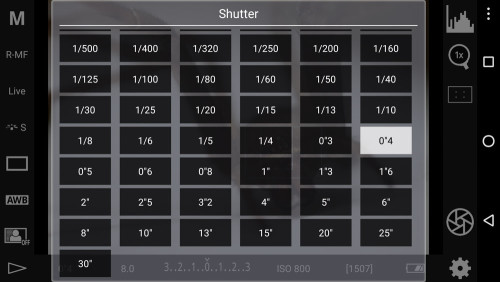
Instead of you needing to manually adjust exposure for HDR shots, DSLR controller will do that for you automatically. It won’t combine those photos for you, but it does expedite the shooting process.
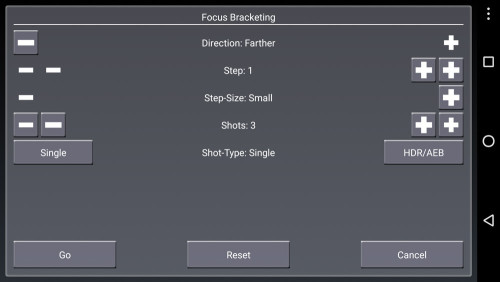
The focus bracketing tool automatically shoots a sequence of photos at various focal lengths that can later be combined to create one photo with a wider focus range. This technique is especially useful with macro photography, but, of course, you’ll need to continue the process of combining the photos on your PC.
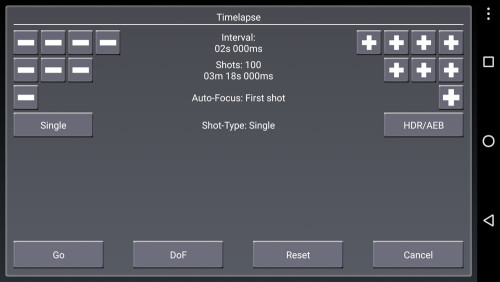
Normally, if you want to shoot time-lapse images, you’d have to pick up an intervalometer — a tool that automates shooting photos in intervals. But, with this app, there’s a built-in tool that does just that.
The setup screen for the time-lapse tool is a little confusing at first, so you may need to tinker with it a bit to get the hang of it. Essentially, the blocks on the left are “minus” buttons, and the blocks on the right are “plus” buttons. Use them to adjust the elements down the middle of the screen (like interval, shots, and autofocus.) when you’re set, hit “go,” and your camera will start firing without any extra help.
As always, bring extra batteries for your camera, since being connected to your android will draw more power than usual. Likewise, it’s very useful to bring an extra battery for your device (if its battery can be swapped).
There are several other apps that address similar functionality via the USB port of your tablet and OTG, but I don’t think any do it as well as DSLR controller. Not only that, but at $8 it is absolutely the most affordable solution with features this robust. The closest competitor, helicon remote, offers a “free/lite” version, but it only works with low resolution jpegs (definitely not raw), and when it comes time to purchase the full app costs $50. Remember DSLR controller is still listed as “beta” but is very stable. I guess it’s just a way of that they aren’t responsible if something goes wrong when you’re using their software.
In addition to the spectacular functionality of DSLR controller, you can control your camera via Wi-Fi wirelessly. For camera’s without Wi-Fi (like my canon 5d mark iii & canon 5dsr). This includes other devices running DSLR controller, cameras with Wi-Fi support like the 70d & 6d, wft boxes, and android TV sticks.
It is important to know that liveview performance using Wi-Fi is usually significantly lower than using a usb connection. Even if the Wi-Fi link is high performance, you are likely to experience higher latencies using Wi-Fi. There is no difference in DSLR controller’s functionality between USB & WI-fi connections.
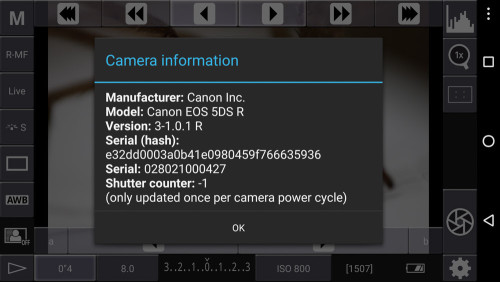
If you have two devices capable of running DSLR controller, you can hook one of them up to your camera using USB, and control the setup wirelessly using the second device. Starting off, make sure both devices are connected to the same Wi-Fi network. This can be a normal Wi-Fi network, a private hotspot like described above, or even a Wi-Fi direct connection – as long as they’re both connected to the same network.
Instructions on how to connect to the tl-mr3040 the custom DSLR controller firmware can be found in creating a wireless remote from a TP-link TL-MR3040 guide. Check the YouTube video below to know more.
[youtuber youtube=’https://www.youtube.com/watch?v=xnlYzt6zcpw’]
Instructions on how to connect to a modified android tv stick running the dslr controller wi-fi stick software can be found in creating a wireless remote from an android tv stick guide.
Connecting to a camera equipped with Wi-Fi (like the 70d or 6d) or a WFT can be found here. Check the YouTube video below to know more.
[youtuber youtube=’https://www.youtube.com/watch?v=ssr_0tlqmZ0′]

Thanks for all the info Dr. Krishi. Very useful
Thanks for the review. Bought the app yesterday. I have one question. Is there any possibility as substitute for the AE/AEL and back button focus stuff. I want to use it (like i could on my Samsung NX) for focusing one area and light metering another.
Regards,
Mark.
Dear Dr.Krishna Mohan
I am making a book scanner along the lines of David Landin. Please see the video below. https://www.youtube.com/watch?v=ns3jGFbJvXI
https://www.youtube.com/watch?v=s97wZ5mzLSc
I need to decide on the cameras. since i am going to to take photographs of pages from old books, i may not be needing the high end cameras . but i need to control the cameras using an app. like DSLR controller. The choice before me is
A. the much cheaper ( below 10k) canon power shot 2600, canon Ixus 160/170
/175/180. Will these deliver good quality images without edge distortion/barrel distortion/chromatic aberration. what is their shutter rating.
B. Somewhat costlier ( 20k -40k) Canon EOS 600D/1300D/700D/M3/M10
These are no doubt of good quality, but any suggestion for Book scanning.
Thanks
Ramakrishna
Hi
I read your review on DSLR Controller. I have a question. For focus stacking, there are two settings. Step and step size. What does it mean?
Could you elaborate?
Dear HC Asthana,
Thanks for contacting me.
Have you read this article ? http://dslrcontroller.com/guide-rmf_focuspull.php
If not please go through it which illustrates it well.
Step-size is the focus adjustment size (there are three step sizes aka speeds, they cannot be translated into each other reliably), step is the number of focus adjustments between shots.
What I would personally do in this situation:
– Switch to R-MF mode (if not set already)
– Select a focus speed (step size) by tap-and-hold on the one of the top row arrow buttons
– Use the bottom row of arrows to navigate to your focus end position
– Tap-and-hold the “A” button to store
– Use the bottom row of arrows to navigate to your focus start position
– Go to “Settings” (cogwheel, bottom right), then “Focus bracketing”
– You should get a popup, select “Bracket to A”
Direction, step, step-size, and shots are now preset. If you press Go, you will get shots from the current focus position back to “A”.
As stated, the numbers are preset for you. I will accept that and shoot.
Remember that they are however not locked. So if you start with step(1) and shots(20), but you want only 10 shots, you would have to manually adjust both shots to 10, as well as step to 2.
In this case, I would not adjust step-size at all – unless you know exactly what effect this has on your lens. It is better to go for the method above and get both step size and steps as a preset
I hope this answers your question
Is there a way I can use dslr controller and shoe thru viewfinder or will it only work in live view
Thanks for contacting me dslr controller can only work with Live view. Since Viewfinder will be off while in live view, you don’t get to see though view finder. Only Electronic viewfinder cameras like mirrorless can solve the issue, no DSLR can.
Dear Dr Mohan,
What a lucid, concise review. One of the best I have read. It told me everything necessary and the app seems well worth the small amount asked. I have a Canon 550D, 60 mm macro, etc and love natural history photography. My wife & I also love India deeply having travelled in Rajasthan & Punjab, staying with Indian friends and enjoying food and culture. Now we are 80 and not able to travel there again, but live in Spain. What wonderful insects the Odonata are; such glittering beauty and incredible aerial control. I hope to use the dslr controller app with my new 150-600 Sigma Contemporary lens to capture them in flight.
thank you for Rev. what’s about video shotting and live veiw monitor quality in tablet ? is that problem for focuse?
Top review! Very useful!
Hi, if I use magnification in live view, can I still see the grid?
Great review, thank you. Do you know if there is the ability to add GPS coordinates to your recorded image? Maybe this could happen if you’re connected Android device was a phone..?