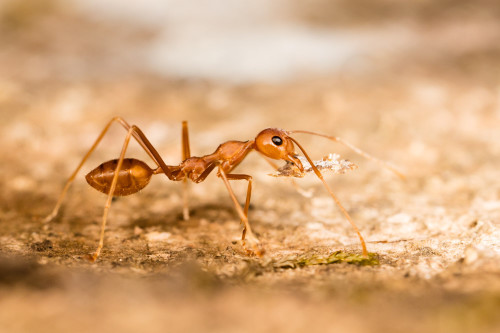
Macro photography is an area where depth of field is an extremely crucial factor. Here the weaver ant (Oecophylla smaragdina) carrying moss in its mouth is captured at f/10. Why so much of this photo is blurred in the photograph above? It’s not due to poor focusing technique. If you look carefully, you’ll see that I placed focus on the ant’s eye, always a good choice whether photographing people or insects. The range of objects in front of and behind my point of focus that can be simultaneously rendered in sharp focus is extremely shallow. The result? We see sharp detail in just a tiny portion of the whole image.
I have already covered depth of field here, please check that blog for deeper understanding of the discussion here.
The lens I used here is extremely challenging Canon MP-E 65mm f/2.8 1-5x Macro lens. This is a manual focus lens designed only for macro purposes – there is no focus adjustment. You set the magnification (2X magnification here) and the move the camera to achieve focus. Depth of field is very thin at 2X magnification I used; at f/10 depth of field was only 0.594mm. Aperture f/10 is a relatively smaller aperture, still the depth of field is so minuscule.
Depth of field is dependent on Aperture, Subject magnification and the Camera sensor. Since camera sensor size cannot be altered unless we change the camera, let us leave that option. Point and shoots are great for macro as they provide a deep depth of field.
Depth of field can be deepened by using the lessor magnification, by stepping back from the subject and making it take up less space in the frame. This most certainly works to increase depth of field.
But there is a problem here. In macro photography, with lesser magnification, subject now fills less of the frame. By cropping it in post processing, we are decreasing the quality of the image as well as sharpness as, we are throwing away pixels, when we are cropping it. I always wish to capture my scene in as close a state as possible to the final image.

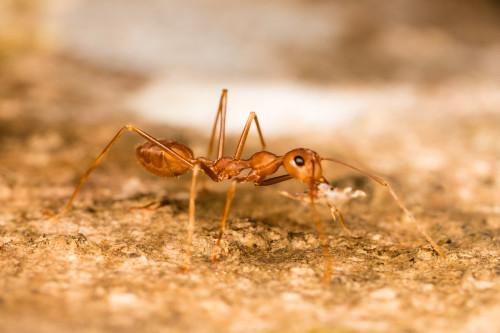
Take a look at the image above. This is the same ant, and has the same settings as the first image; in fact, depth of field is exactly same as the first image. Yet, the image doesn’t lack for greater depth of field. Almost the entire ant is in focus.
The difference here is that the subject was shot from a direction which enabled me to fit most of its interesting parts along a single plane of focus. Remember that depth of field controls how far in front of and behind the point of focus can be rendered in sharp focus. Yet all points in the scene that exist at the same distance from the lens can be in focus simultaneously, no matter the amount of depth of field available. What I’ve done here is to carefully position the camera so that all of the parts I want to be in focus fall along a plane that is parallel to and therefore equidistant from the lens. The ant’s side is relatively thin, so by adjusting the camera lens to be parallel with the ant’s body, it is possible to get sharp focus on all of the body parts which stand out the most.

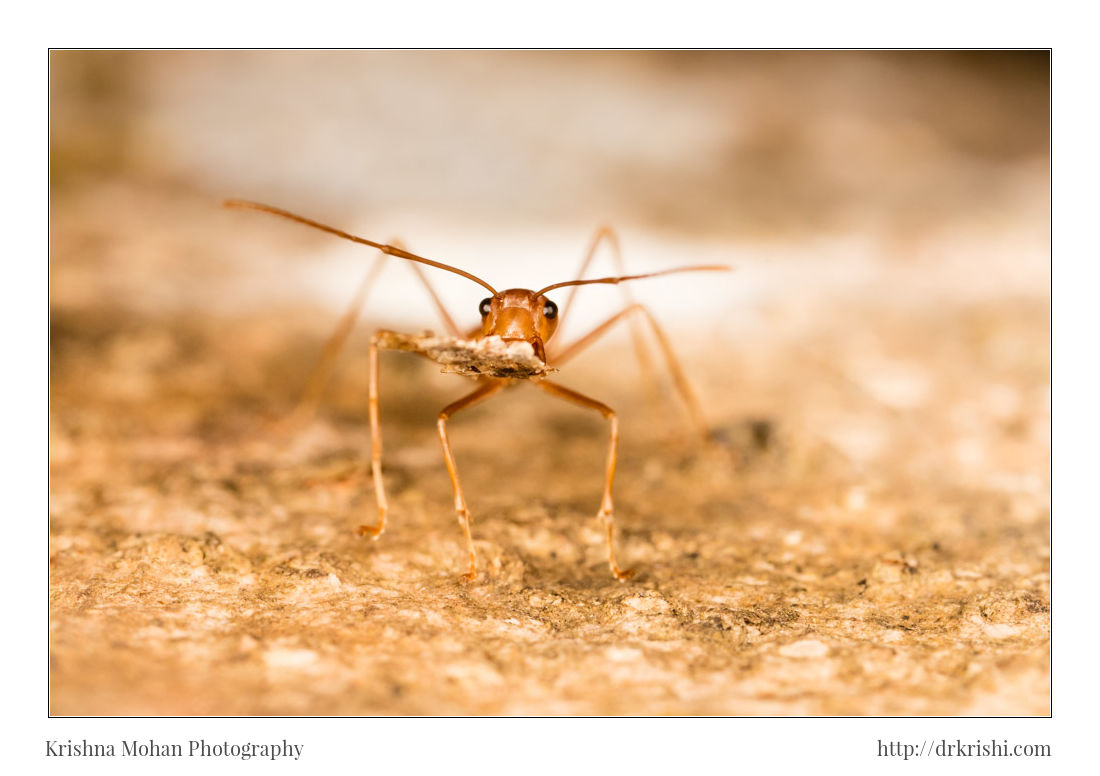
Check the photo above when I was NOT parallel with the ant’s body, the ant will look out of focus. Head and eyes which are crucial, are out of focus.
It’s very important to understand that we have not extended depth of field. It is still extremely shallow. Look at the ant’s front right leg, other than that leg, every other leg is out of focus. Shallow depth of field caused that. Since viewer is concentrating on the body of the ant, they tend to ignore the out of focus areas. Although depth of field is shallow, if the subject is flat enough we can shoot at an angle parallel to the subject and produce an image with satisfying focus.
This is by far the easiest and most common method of dealing with the depth of field problem in macro. What happens if we want to view the subject at a frontal angle or even a diagonal, especially if your subject has irregular shapes? Focus stacking is the answer.
Focus stacking is a process that involves two stages. First, in the field, you shoot a series of images with identical composition, each focused on a plane of different depth on the subject’s body. For example, one shot can be focused on the eye, the other on the proboscis, and so forth. You shoot as many images as you need. The main rule is that every part of the subject you want to appear sharp in the final image must exist in sharp focus in at least one image of the series.
Next, in the comfort of your home, you can use any number of software programs which automatically select the focused parts of each image and stack them together – hence then term ‘focus stacking’ – into a composite image that exhibits a wider depth of field than you could ever hope to capture in a single exposure.
Focus stacking is a fantastic innovation for the macro photographer. And while it does take more time and careful preparation in the field, there just isn’t a better way of obtaining both detail and increased depth of field in extreme magnifications. I have covered focus stacking in my blog here.
Shallow depth of field in Macro photography is not really bad, in fact it is one of the most effective compositional tools at our disposal. By purposefully using shallow DOF you can create a dramatic appearance and lead the viewer’s attention to specific elements in the scene, control that is critical to success in every style of photography.


Very useful description of Macro Photography Dr. Krishi.
Another way to increase depth of field would be to shoot on a smaller format sensor with lenses built for that. Easier said than done though…