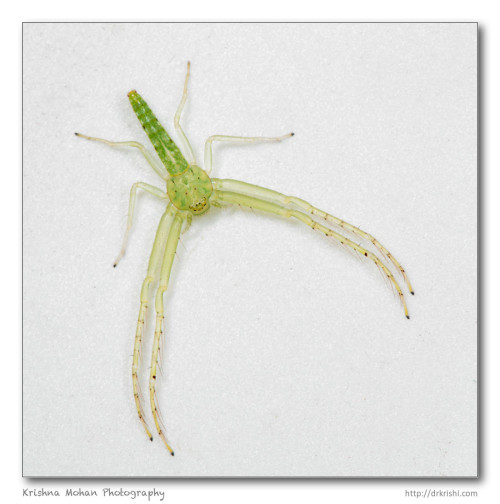
Many of our readers have made several polite inquires concerning the border utilized on my photographs.
If you enlarge any of the images used on my blog, you will notice a dainty white bordering to them, further accentuated by a drop shadow.
This bordering was created using a very handy open source tool called ImageMagick, which can be downloaded absolutely free at: http://www.imagemagick.org/ The website also hosts a great resource on using this very versatile tool.
ImageMagick works primarily as a command line tool. Though it was developed primarily for use on Linux/Unix operating systems, it works like a charm on all operating systems, it’s functionality almost rivaling some of the best image processing softwares out there. It can be used to edit and compose bit- map images and can read, convert and write images in a variety of formats (around one hundred) including GIF, JPEG, JPEG-2000, PNG, PDF, PhotoCD, TIFF, and DPX. One can also use ImageMagick to translate, flip, mirror, rotate, scale, shear and transform images, adjust image colors, apply various special effects, or draw text, lines, polygons, ellipses and Bezier curves.
ImageMagick is also delivered as a ready-to-run binary distribution or as a source code which can be can freely used, copied, modified and distributed.
The functionality of ImageMagick is typically utilized either via the command line interface or from programs written in your favourite programming language. Using a language interface, you can use ImageMagick to modify or create images automagically and dynamically.
My ImageMagick usage is mainly via the command line interface which is extremely useful if the same operation has to be carried out repeatedly (and automatically). I run mageMagick script on the exported JPEG file from Adobe Photoshop Lightroom where I post processed it. This JPEG file approximately 1000 pixel width.
Given below are the steps used in order to achieve the photo border utilized on all my images, including the watermark.
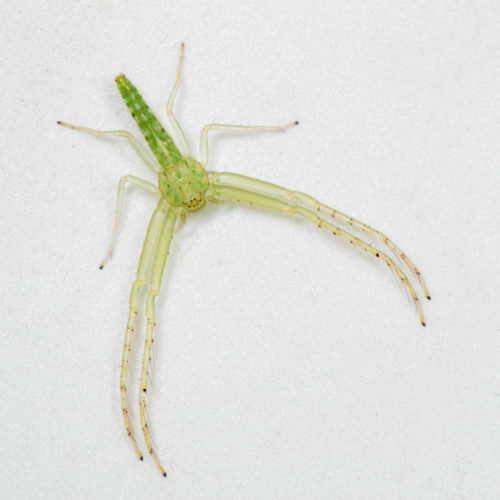
I will be using my Green Crab Spider photograph, previously used in a feature article this blog, as an example for this tutorial. The operating system used to demonstrate the steps is Windows , but the commands used are similar for all other operating systems.
Let us start first by adding a stroke of 1-pixel width black color all round the image.
convert spider.jpg -bordercolor black -border 1 spider1.jpg
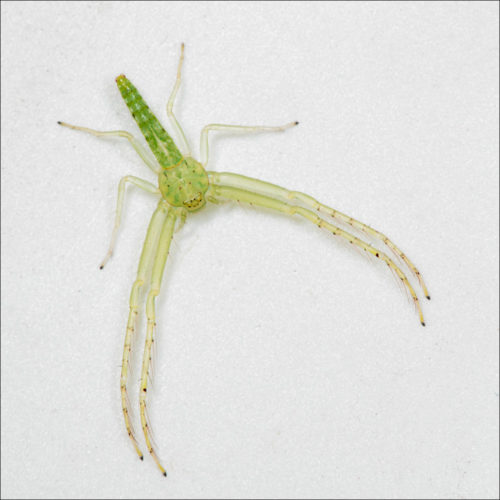
Next, we add another stroke of 1-pixel width white color, around the image.
convert spider1.jpg -bordercolor white -border 1 spider2.jpg
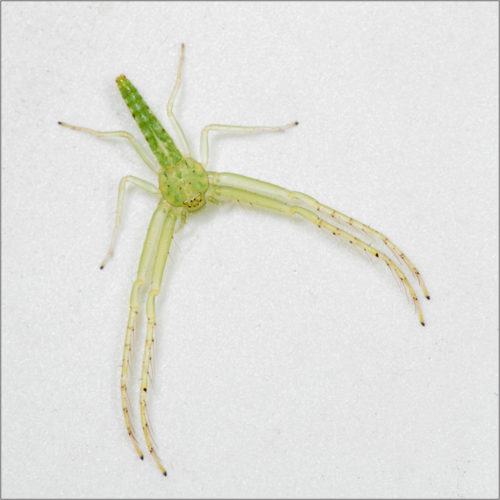
Now, we need create a new white layer to add a ‘shadow’ of sorts, to the spider image and move that new layer below the photo.
convert spider2.jpg ( +clone -background black -shadow 70x9+10+10 ) ^

+swap -background white -layers merge spider3.jpg
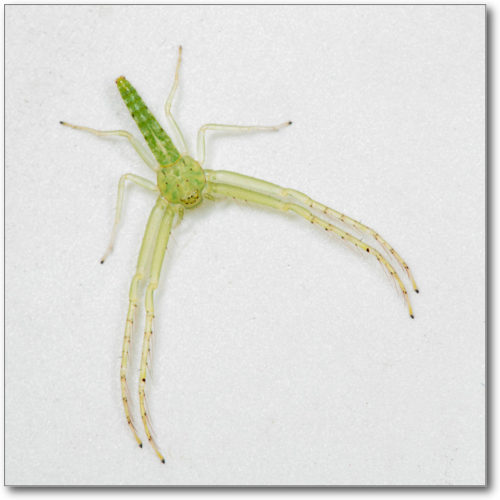
This is a complicated step. ImageMagick creates a temporary layer, retaining one operation in memory. When commanded to merge, it proceeds to join two layers into a single image. What I have done is essentially split the command furnished above, into two lines. In a windows/Dos environment we use ^ to get multiline batch statements. In Linux \is used to get a multiline command. The only thing one needs to ascertain is that there’s no space after ^.
The shadow created here is of 70% intensity with a 9 pixels spread and is shifted towards 10 pixel right and 10 pixel bottom of the image. That is what -shadow 70×9+10+10 represents.
Next we need to add some extra padding to the white border so that it is a good 50 pixel on each side and 60 pixel at the bottom (for my watermark). Border command allows for bordering, all around whereas the splice command allows us to specify how much to add on each side.
convert spider3.jpg -gravity northwest -splice 40x40 -gravity southeast -splice 20x30 +repage spider4.jpg
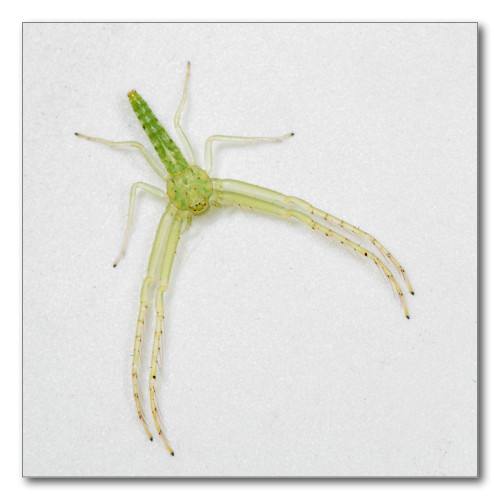
Once the framing is complete, it’s time to reset the canvas so we can add the watermark on this border. To achieve this, we’ll to use the “+repage” command, to completely reset the virtual canvas from the images.
In order to insert the watermark on to the lower border, two text strings are used, one stating the name of my blog and the other displaying the URL.
I prefer the ‘Chalkduster’ font for stating the blog name and Calibri, for the url. Both are at 20 point size and use 50% grey colour. After adding text the image size becomes slightly larger and I end up with a reduced quality image of 80% the capacity of the original, which is still good enough for a blog post.
convert spider4.jpg -font Chalkduster -pointsize 20 -fill grey50 -gravity southwest -annotate +50+12 "Krishna Mohan Photography" ^

-font Calibri -pointsize 20 -fill grey50 -gravity southeast -annotate +48+12 "https://drkrishi.co.in" ^

-quality 80 spider5.jpg
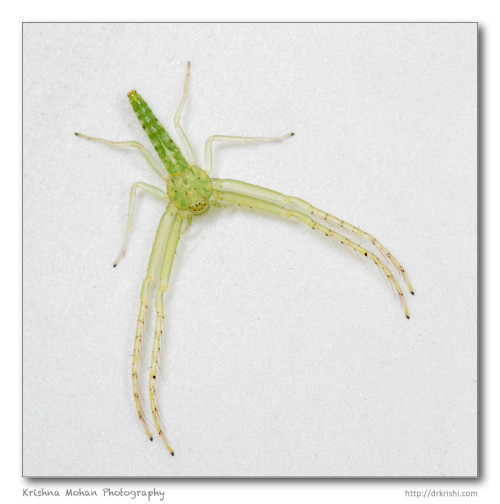
Last, but not the least, we can combine all the above commands into a single file so as to minimize the running of multiple commands, one after another.
convert spider.jpg ^

-bordercolor black -border 1 ^

-bordercolor white -border 1 ^

( +clone -background black -shadow 70x9+10+10 ) ^

+swap -background white -layers merge ^

-gravity northwest -splice 40x40 -gravity southeast -splice 20x30 ^

+repage ^

-font Chalkduster -pointsize 20 -fill grey50 -gravity southwest -annotate +50+12 "Krishna Mohan Photography" ^

-font Calibri -pointsize 20 -fill grey50 -gravity southeast -annotate +48+12 "https://drkrishi.co.in" ^

-quality 80 ^

spider_new.jpg
You can also alternatively make a single line code (even though the page setting of my blog is breaking it into multiple lines)as follows.
convert spider.jpg -bordercolor black -border 1 -bordercolor white -border 1 ( +clone -background black -shadow 70x9+10+10 ) +swap -background white -layers merge -gravity northwest -splice 40x40 -gravity southeast -splice 20x30 +repage -font Chalkduster -pointsize 20 -fill grey50 -gravity southwest -annotate +50+12 "Krishna Mohan Photography" -font Calibri -pointsize 20 -fill grey50 -gravity southeast -annotate +48+12 "https://drkrishi.co.in" -quality 80 spider_new.jpg
And we’re done.
ImageMagick is a great way to automate routine processes like borders and watermarks used on images. If one can overcome the initial hurdle of getting acquainted with the command line interface, miracles could be worked with this gem of a program.


That’s useful one Krishi.
Very helpful, and much needed one. Thanks Sir.
Just a note, on windows 10 though, you have to use “magick” in place of “convert” in your commands everywhere. Convert function gets conflicted with windows reserved keywords. Found out hard-way!
Thank you for this useful post though.
You should have been in IT. Could have easily been a CTO or CIO