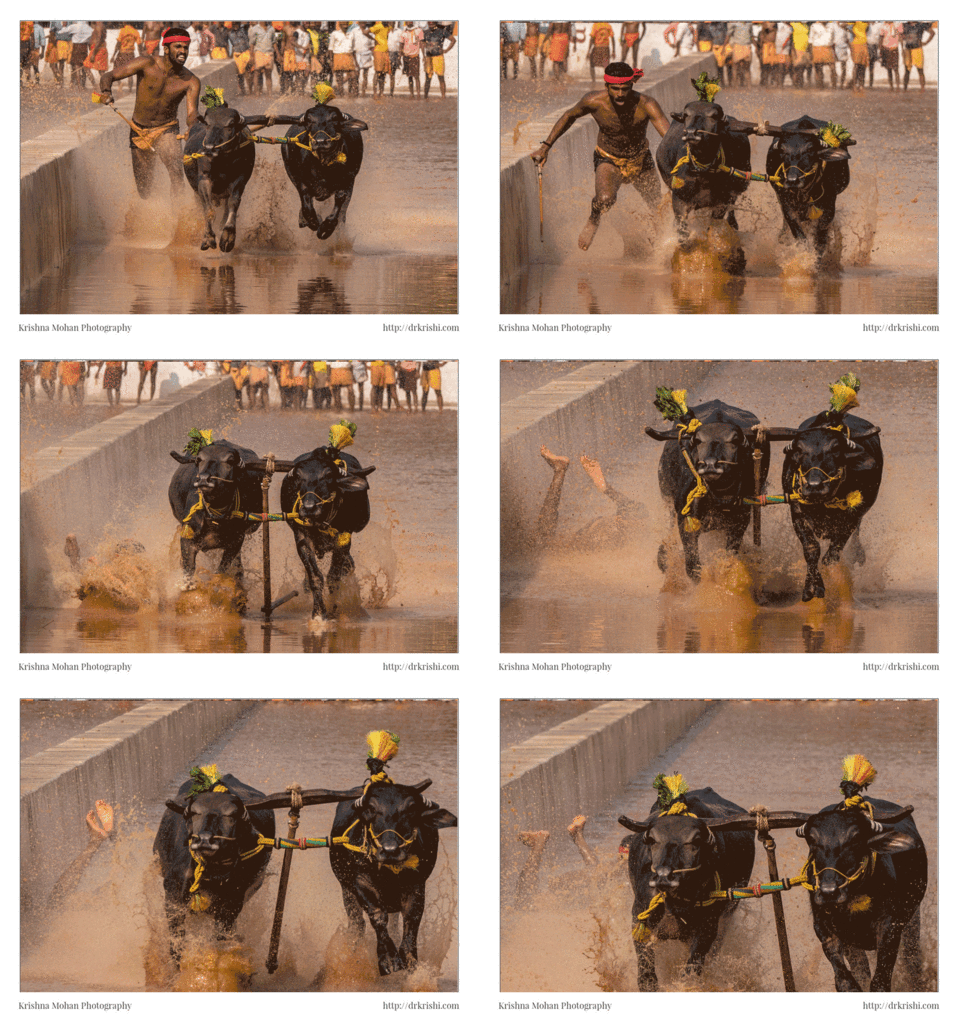
Last week’s blog I posted an animated GIF file showing the slipped runner at the Kambala. Since many have asked how it was done, here is the tutorial. You can check the final GIF above.
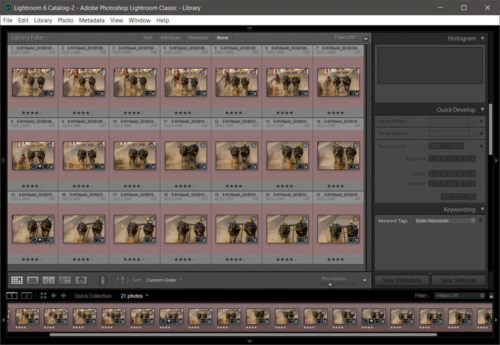
For this to work effectively you need series of photos which are relatively stable. Handheld burst shots I used worked well here. I selected 21 sequential shots and exported from Lightroom as layers to be opened in Photoshop.
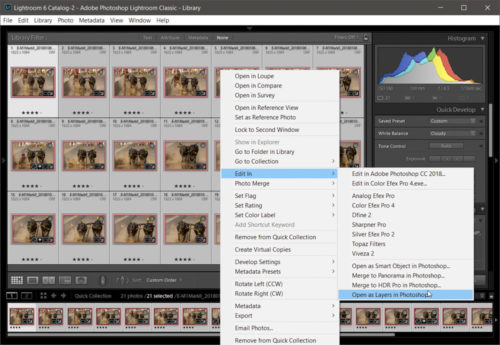
This will export all the 21 files into that many new layers in the Layers panel on the right side of your workspace.
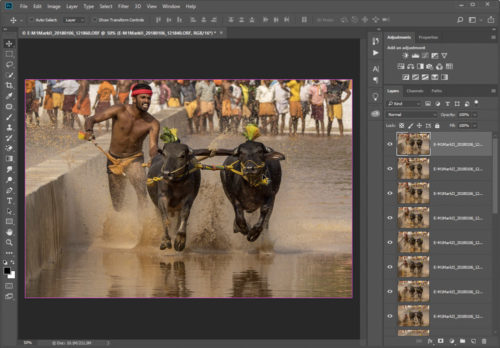
These individual layers will become the frames of the animated GIF.
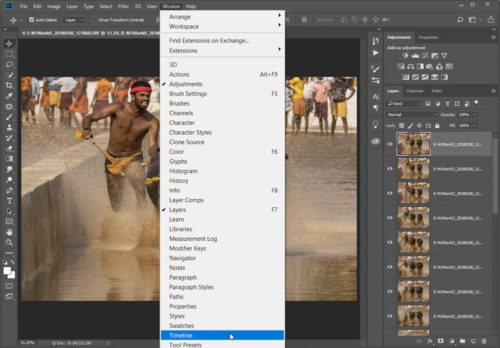
Go to Window > Timeline to open the Timeline panel.
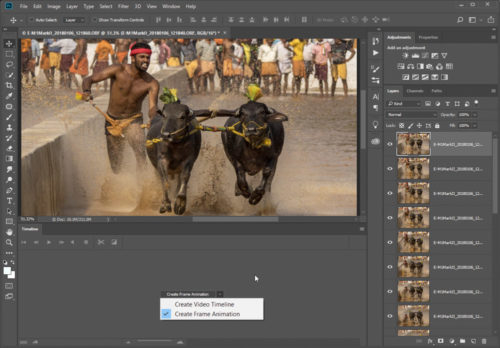
Click the arrow on the button in the middle of the panel and select Create Frame Animation. Then click the button to create a new frame animation.
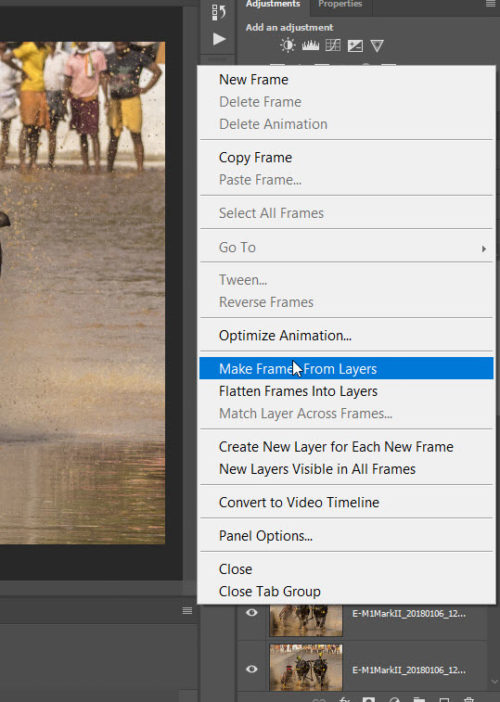
Click the menu icon from the upper right corner of the Timeline panel. Click “Make Frames From Layers”.
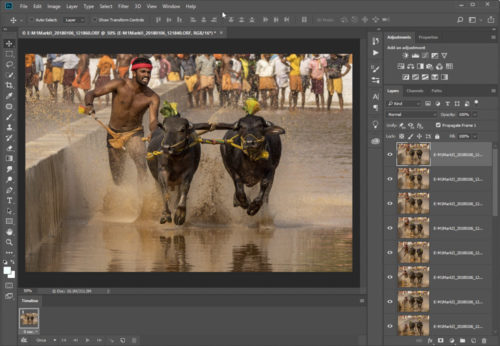
This will convert all the layers in the Layers panel into individual frames in your animation. Click the Play button at the bottom of the Timeline panel (or press the Spacebar on your keyboard) to preview the animation.
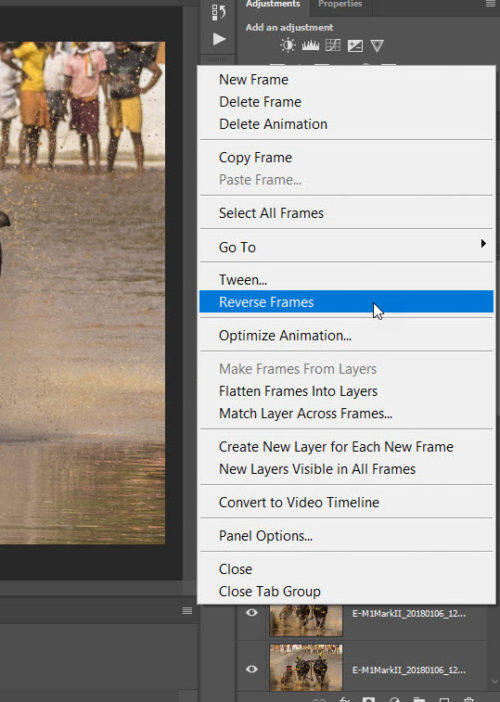
If your animation is playing in reverse, click the Timeline menu icon again and select Reverse Frames.
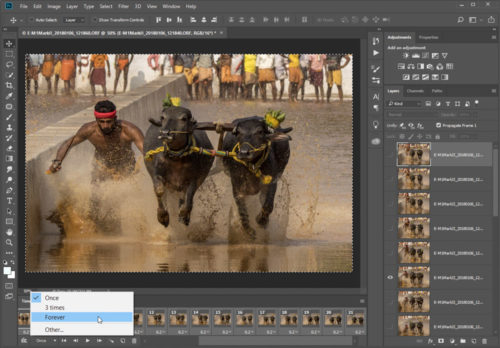
Click the repeat menu from the bottom of the Timeline panel and select Forever. This will create a looping animation.
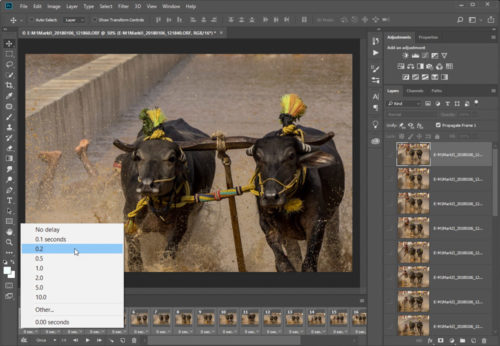
You can select all frames and change the time delay between frames. I used 0.2 seconds. Click the Play button at the bottom of the Timeline panel (or press the Spacebar on your keyboard) to preview the animation. If you are satisfied with results you can now export the animation as a GIF.
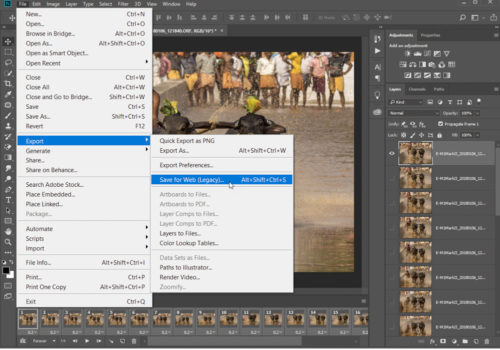
Go to File > Export > Save for Web (Legacy)…
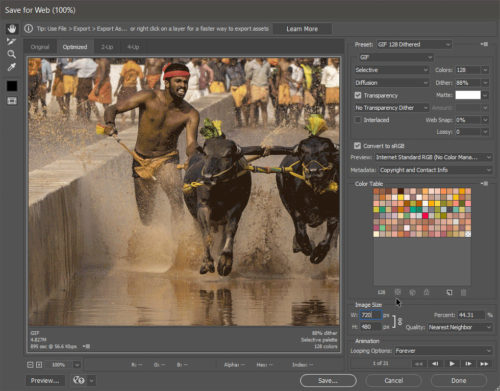
Select GIF 128 Dithered from the Preset menu. If you are using the GIF online or want to limit the file size of the animation, change Width and Height fields in the Image Size options. Select Forever from the Looping Options menu. Click the Preview… button in the lower left corner of the Export window to preview your GIF in a web browser. Click Save… and select a destination for your animated GIF file. Congratulations! You have just created your animated GIF. Post it online to show it to the world.

Note that you can also use this technique for any layered Photoshop file.
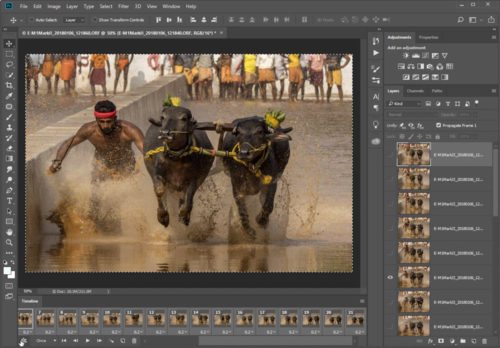
Here is a bonus. You can convert GIF to a video. Go to the lower left edge of the Timeline and click to convert frames to video tracks.
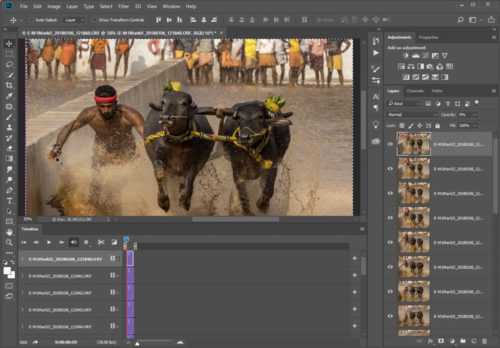
You can play around with various tracks and even add a soundtrack to the video. Once satisfied with the result, you can choose to rend Video.
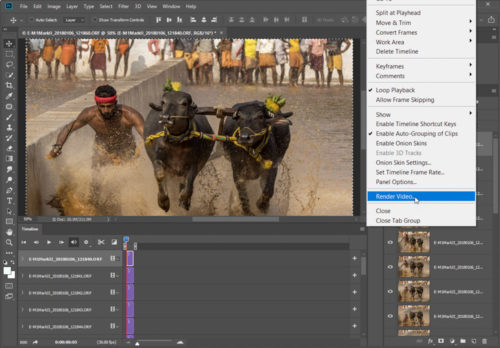
It will be saved as an MP4 file on your hard disk which you can post it online to show it to the world.
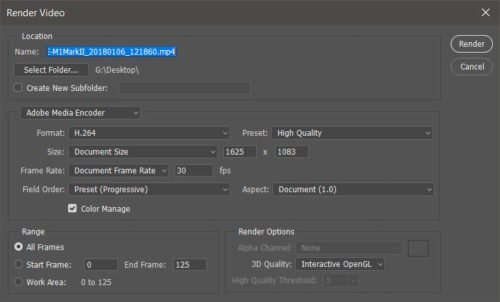
Check the video I created below.
[youtube]XPemHgdY7jo[/youtube]


Thank you, that’s a wonderful GIF and a very nice tutorial, will try
Nice tutorial doc
Oh .. very nice tutorial , Thank you so much.
Oh .. very nice tutorial, Thank you so much.
Wow nice simple and well explained. Is there an alternative to people like me who don’t have PS Doc ??
There are so many online free GIF maker applications. Check this article for more – https://www.thebalance.com/free-gif-makers-1357013
I have been using LiceCap and I must say that it is a good tool. The gifs made by Licecap are quite huge in terms of size. Is there any way to resize the file itself maintaining the quality if GIFs?
Few years later and still works like a charm, very simple method of creating a gif or short video
I have been using LiceCap and I must say that it is a wonderful tool. The gifs made by Licecap are quite huge in terms of size. Is there any way to resize the file itself maintaining the quality if GIFs?