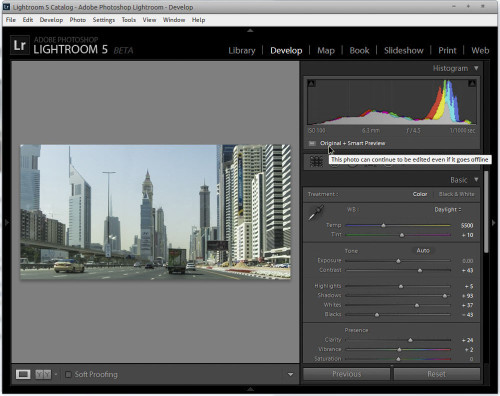
Adobe’s raw-editing and management software, Adobe Lightroom, enters a public beta in its 5th edition today with a modest set of enhancements. You can download it from here – http://www.adobe.com/cfusion/entitlement/index.cfm?e=labs_lightroom5. If you’re contemplating installing this beta, keep in mind that LR5 beta can’t import LR4 catalogs, so you’ll either have to start fresh with a new catalog. You can keep side-by-side installations of the two versions, though I’ve found Adobe Lightroom 4.4 crashed twice when I’m jumping back and forth. The beta will expire on June 30, but it’s free to all.
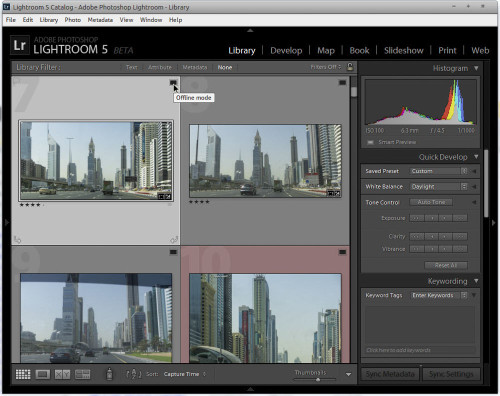
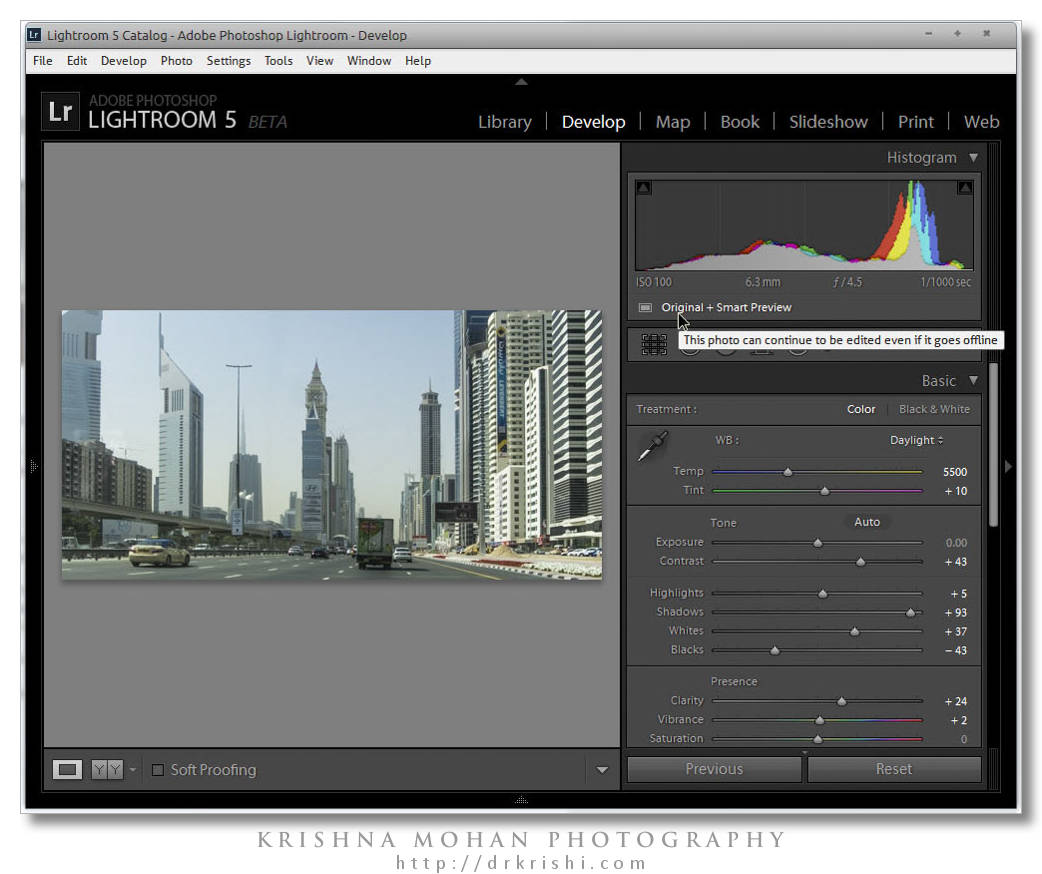
With the new solid state drives and ultra-books which have limited storage capacity, Image libraries and original raw files, are often stored on detachable storage device. New Smart Previews in Lightroom 5 lets us easily work with images without bringing entire library with them. LR5 just generate smaller, stand-in files called Smart Previews and allows you to leave the originals back at home. You can make adjustments or metadata additions to Smart Previews and apply their changes to the full size originals later when you reconnect to the device holding the original files, all non destructively, of course. Adobe Lightroom 5 can selectively or automatically generate roughly 4.5 mega-pixel, 1.5MB (or smaller) versions of images that it stores in its lossy DNG format. You generate them via a globally applied check box on import, select to generate them individually on already-imported files, or set a global preference for it. They can also be selectively discarded. It took about 15 minutes to generate the Smart Previews for a little more than 1963 images.
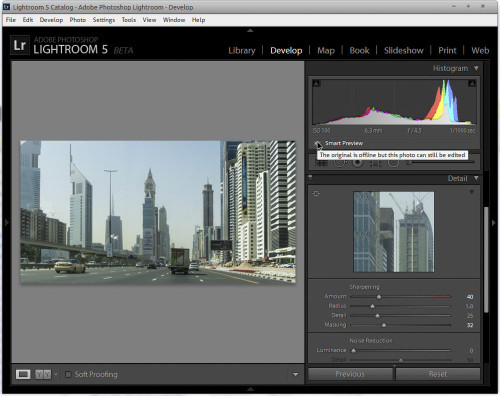
When a drive is disconnected, you can still work and run develop settings on these files; when you reconnect the drive, the application automatically syncs the changes. You can also export from the Smart Preview. The Smart Preview files reside in a separate catalog that lives in the same folder as the main LR catalogs. Since they’re regular DNG files, you can even open them in Photoshop, which is nice, though the folder structure is annoyingly discrete, creating a separate folder for each file. Smart Previews for 1963 files took 2.56GB of disk space (in contrast, the LR5 catalog of 1963 files with minimal previews took only about 1.41GB).
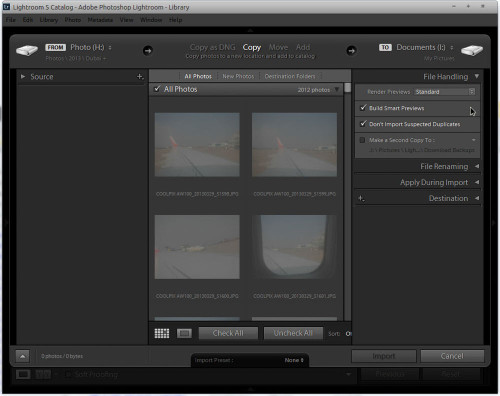
Smart Preview worked seamlessly for me. If you have images scattered across multiple storage devices that you have to retrieve periodically, this may come in quite handy. You can filter by Smart Preview for quick purges; other new filter criteria include file size, bit depth, number of color channels, color profile, and PNG file type (you can now import PNG files).
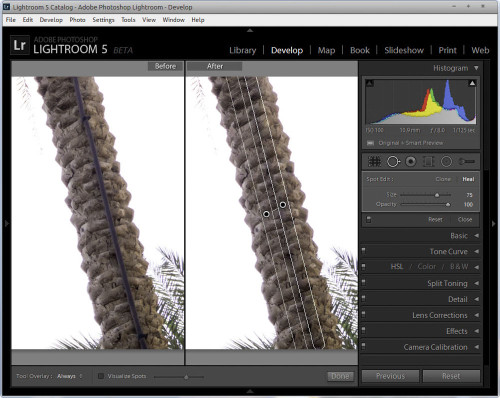
Till now Photographers could only heal circular areas, but many unwanted elements in photographs have irregular shapes. With the Advanced Healing Brush, photographers can now adjust the size of the brush and move it in precise paths, so unwanted objects and flaws—even those with irregular shapes like threads—just disappear. Advanced spot healing/clone tool is a much needed enhancement now incorporated into a brush. It is very useful for working on irregularly shaped areas. It’s not without its glitches, perhaps because it’s unused to finding matches for larger areas. Also, Shift+Q will toggle you between clone and heal. I had two sand particles in front of the lens which were captured as dust gremlins in this lovely capture of Burj Khalifa getting smaller.
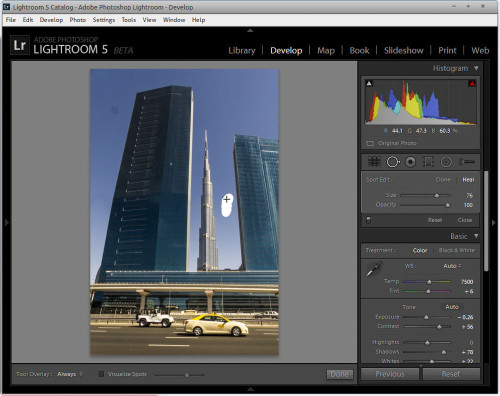
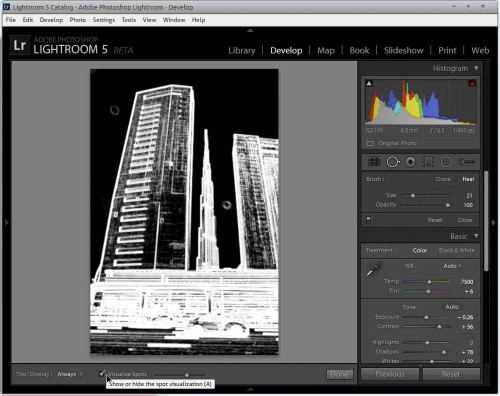
There’s also a new option for healing, Visualize Spots, which I found rather hit-and-miss.
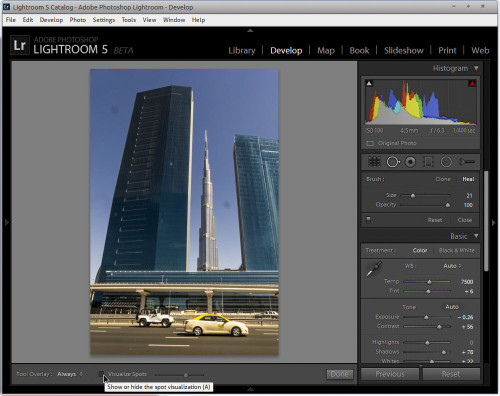
It renders a black-and-white edge detection view with a sensitivity slider so that you can presumably see dust spots better.
Busy backgrounds or bright colors can distract viewers from the focal point of an image. Till now you could use focusing the viewer’s attention using a vignette effect, but this only works if a subject is in the center of an image. The Radial Gradient tool in Lightroom 5 now offers photographers more flexibility and control in how they guide a viewer’s eye to emphasize the important parts of an image. Using this tool, photographers can create off-center vignette effects or multiple vignette areas in a single image. This local adjustment control lets photographers minimize distractions and focus a viewer’s attention exactly where it should be.
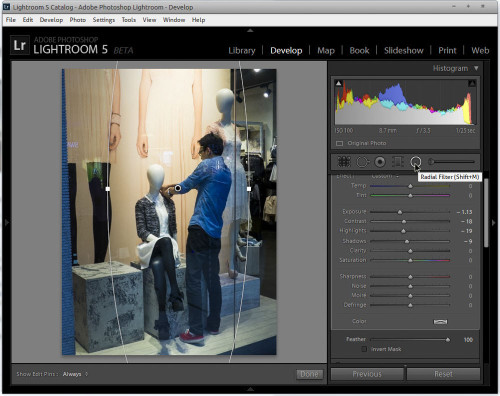
This picture of Dubai Mall where the mannequin was being dressed I wanted to darken the background so as to make the action stand out. With the new Radial Filter operates exactly like the Graduated Filter to apply circular masked adjustments, and I think it will prove to be a quick replacement for some retouching I’ve been handling with local adjustment brush operations. It also provides a workaround for applying vignette effects off center or in multiple locations, which you can’t do with post-crop vignetting. Adobe has tweaked the Graduated Filter and Adjustment brush by adding the option to duplicate the mask (Alt+Ctrl+drag or Option+Cmd+drag on the mask) — that’s really nice for applying adjustments both inside and outside the mask.
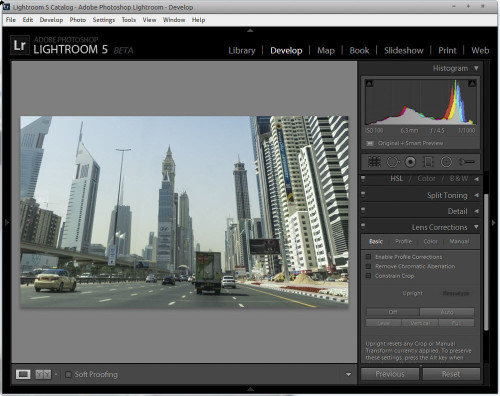
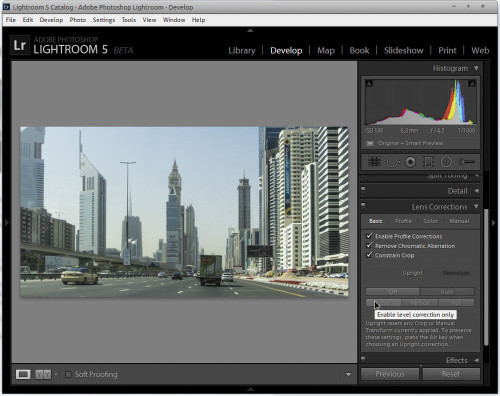
Not holding a camera straight, or taking a picture from wide lens tilted can cause a subject to appear tilted. Correcting such images often requires a number of separate adjustments. The new Upright tool gives photographers four easy methods to straighten tilted images with a single click. Upright analyzes images and detects skewed horizontal and vertical lines, even straightening shots where the horizon is hidden. While you could always correct lens distortion with the lens tools and straighten manually via Crop and Straighten, Lightroom has long needed a more automated but lens-independent way of handling distortion and perspective correction. Upright, which can automatically level an image, as well as adjust vertical perspective correction, with or without cropping to the resulting image area. It works pretty well, and you can use the automatic adjustments as a jumping-off point to fine-tune with the manual controls. It would be nice if the automated results iterated back into the manual settings sliders, though.
If you want to insert videos in your slideshows — not just grabbing the first frame, as in LR4, but videos that play upon loading — now you can. And if, like me, you want to strip the audio track out, the new option to balance the audio between an attached music file. With Lightroom 5 photographers can now easily combine still images, video clips, and music in creative HD video slideshows that can be viewed on almost any computer or device.
Now you can now create custom page layouts, save them, and apply them in subsequent projects. There are also new controls over page numbering.
Lightroom 5 Additional Features
- PNG file support
- True Full Screen Mode
- Configurable grid overlays
- Additional search criteria for filters and smart collections
- Lock zoom position preference settings
- Direction field in EXIF metadata panel
- “Set as Target Collection” checkbox in Create Collections dialogue
- Integrity verification of DNG files
- LAB color readout
- Aspect slider added to the Manual tab in the Lens Correction panel
- Persistent clipping indicators between Lightroom sessions
- Crop overlay aspect ratios
- Visual indicator of Favorite book pages
- Transparent buttons for improved Text creation in Books
Lightroom 5 beta still has no sign of face recognition and tagging (which now needs a round about tour to Picassa), HDR editing, panorama stitching, or video editing capabilities. The performance hasn’t seen any improvement. It seems a little slower on my system, though that may be beta overhead that will be tuned out before it becomes final. New version will not support Windows XP, Vista as well as Mac OS X 10.6.x and needs a newer than these OS for installation.
You can use these resources to see everything that’s new in Lightroom 5 Beta.

Thank u for this.